Unityではユニティちゃんというキャラクタが用意されているのでそれを動かしていきます。
このチュートリアルでは以下のことを行います。
- ユニティちゃんを矢印キーで移動するようにする。
- ユニティちゃんのモーションを使う。
- シンプルなゲームを作る。
- メモリを使いすぎないようPoolを使う。
- ScriptableObjectのEventを使ってみる。
ユニティちゃんを動かす
SDユニティちゃん 3Dモデルデータをダウンロードする
unity-chanのページに行きます。

Unity-chanのページの右上にある[DATA DOWNLOAD]ボタンを押します。
下にスクロールし、[ユニティちゃんライセンスに同意しました。]にチェックして[データをダウンロードする]ボタンを押します。
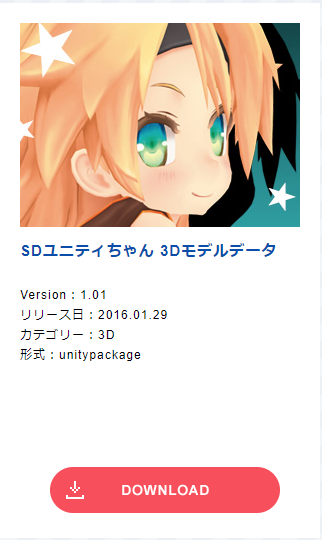
たくさんありますが、今回は[SDユニティちゃん 3Dモデルデータ]を使用します。[DOWNLOAD]ボタンを押すとSD_UnityChan-1.unitypackageがダウンロードされます。
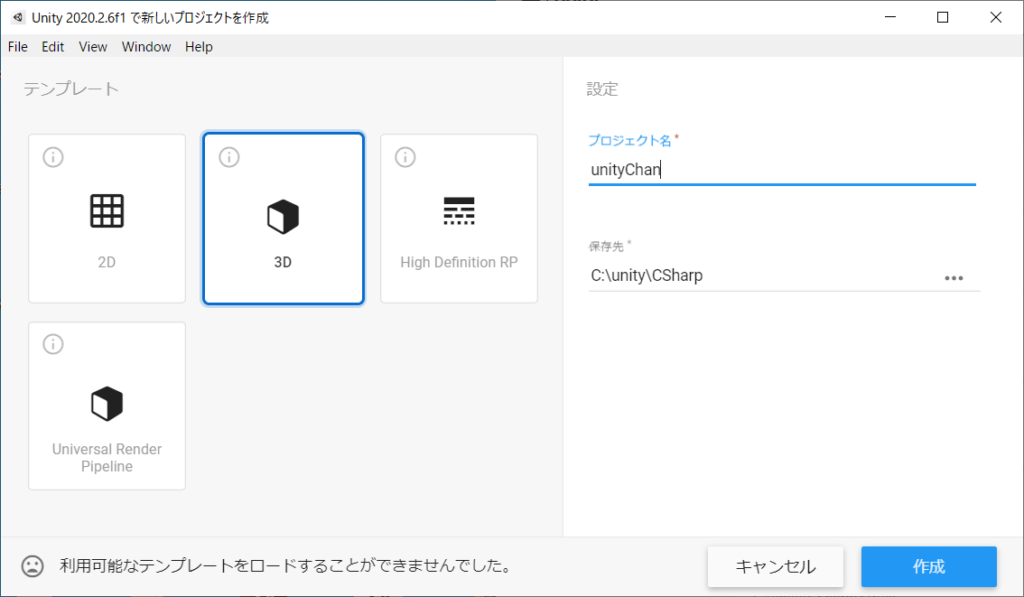
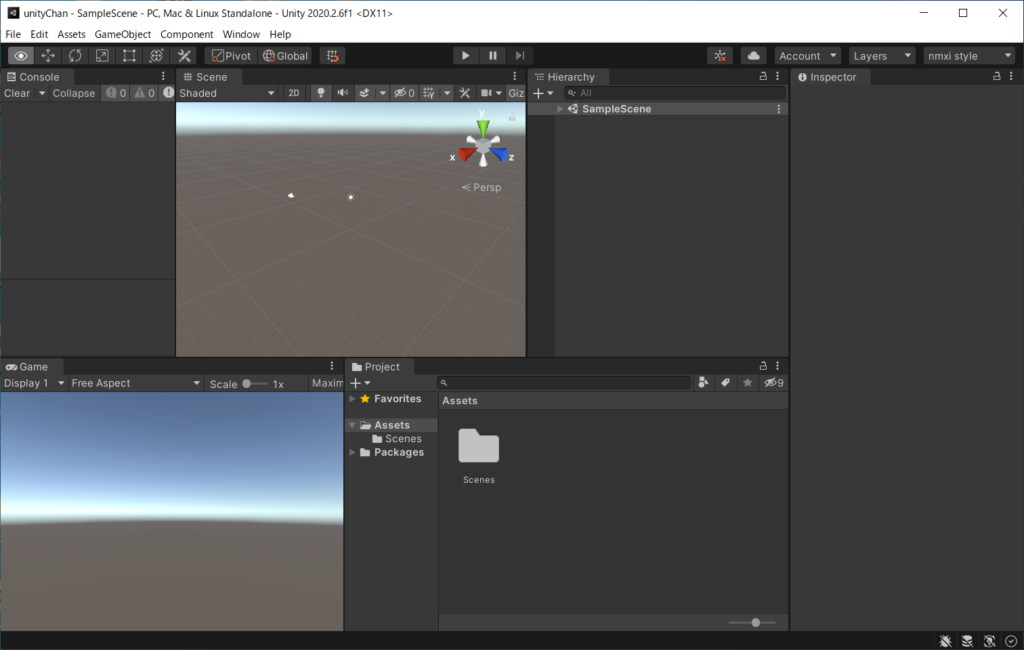
プロジェクトを作成する
Unityのプロジェクトを作成します。
packageをインポートする
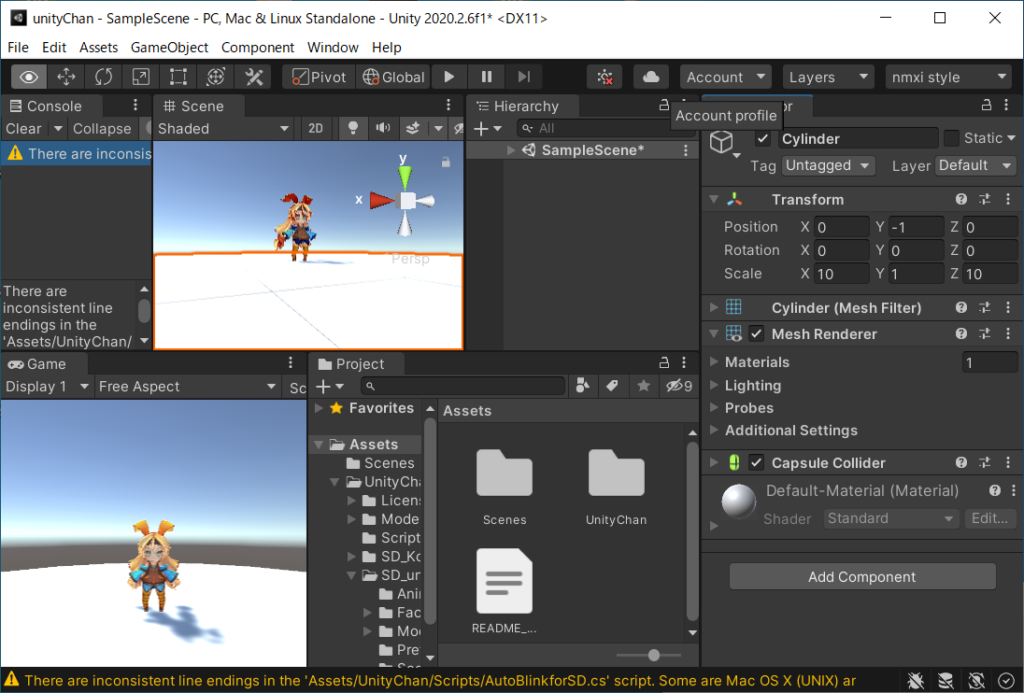
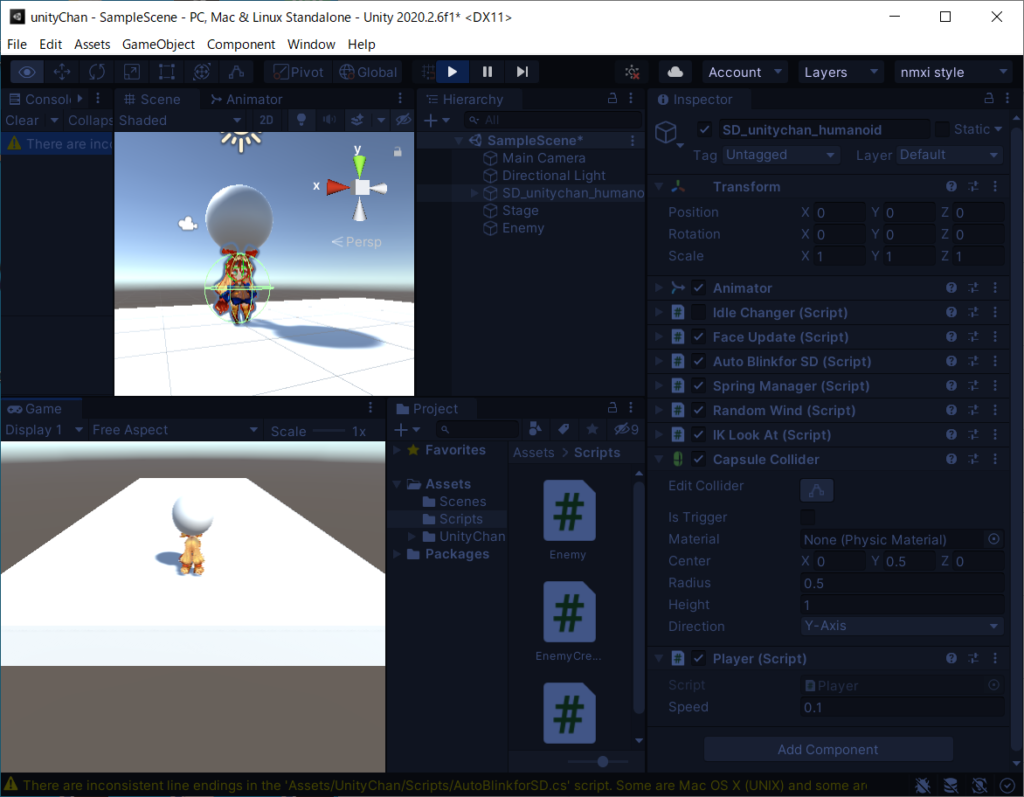
ツールバーの右端の[Layout]で[nmxi style]にしています。
ダウンロードしたpackageをProject windowのAssetsフォルダにドロップします。
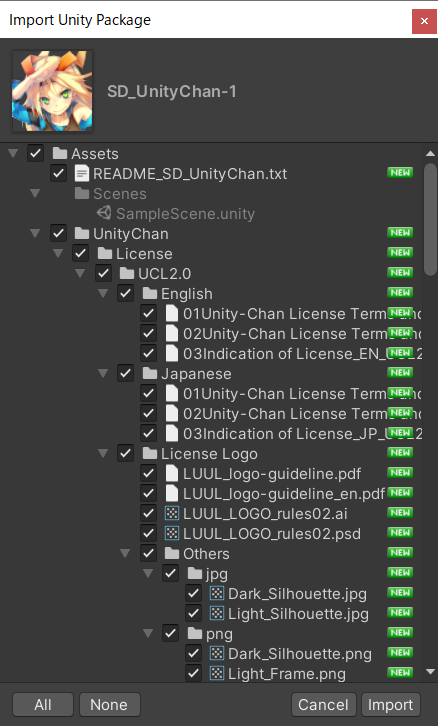
右下の[Import]ボタンでインポートします。
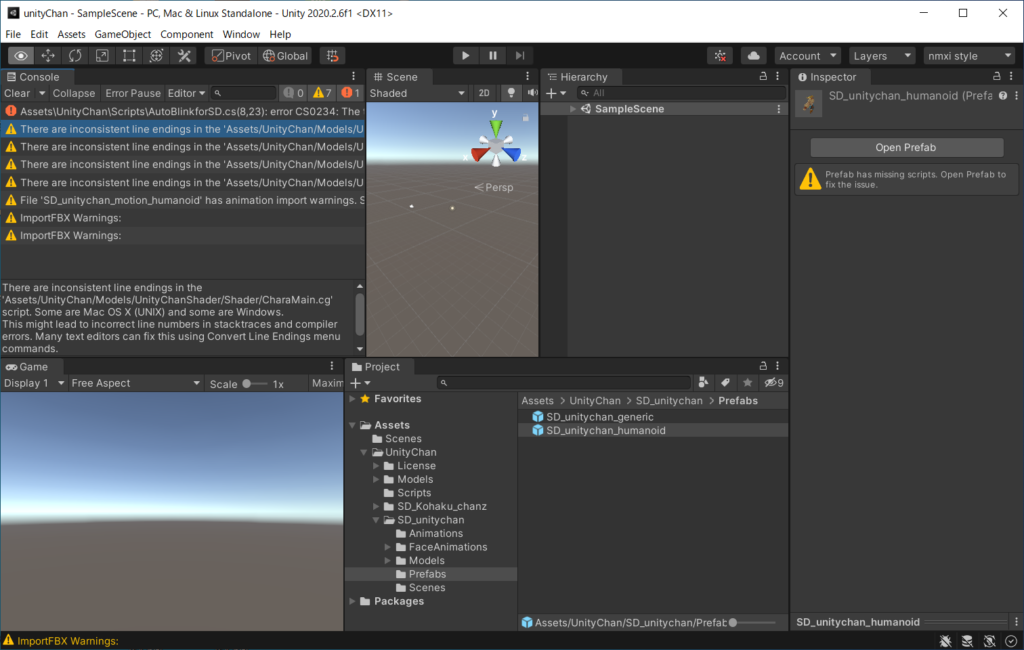
Console windowにエラーとワーニングが出力されています。
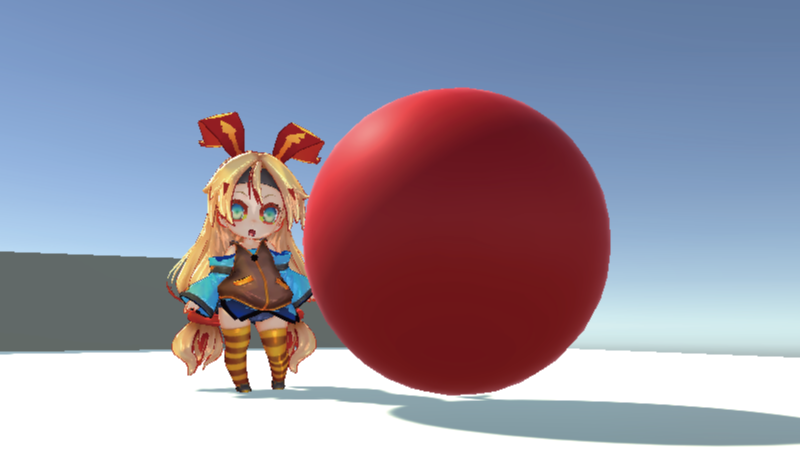
Project windowのUnityChan/SD_unitychan/Prefabs/SD_unitychan_humanoidをHierarchyにドラッグ&ドロップします。
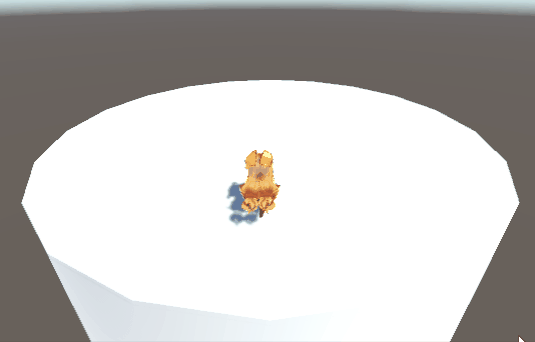
Game viewにユニティちゃんが表示されました。
プレイボタンを押すと、コンパイルエラーがあるため再生されません。
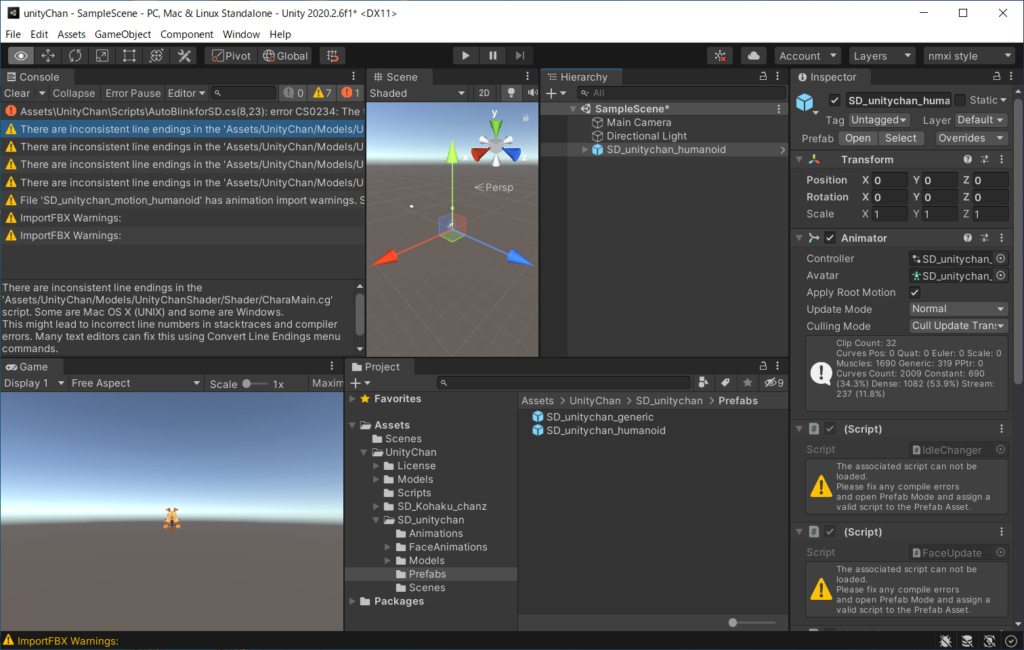
Console windowのエラーの行をダブルクリックします。
ツールが起動されます。ここではVisual Studioが起動されました。
using System.Security.Policy;
System.Security.Policyというnamespaceがないか、あるいは参照が足りてないと出ています。Microsoftのページでは確かにstandard 2.0にはないようです。
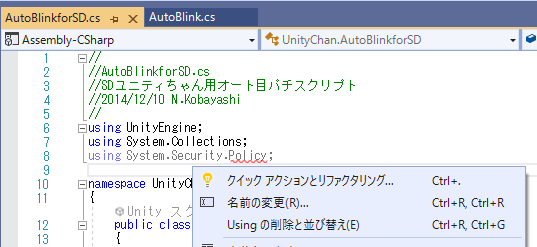
Visual Studioのコンテキストメニューの[Usingの削除と並び替え]メニューで消え、ビルドエラーも出なくなるようです。Playで再生されるようになりました。
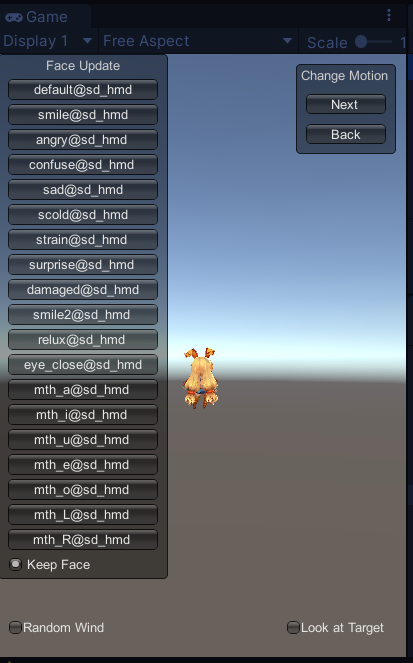
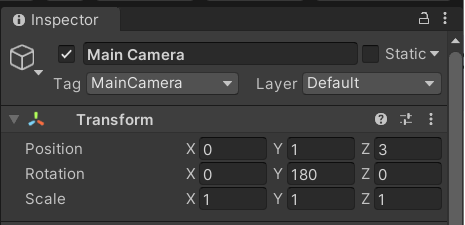
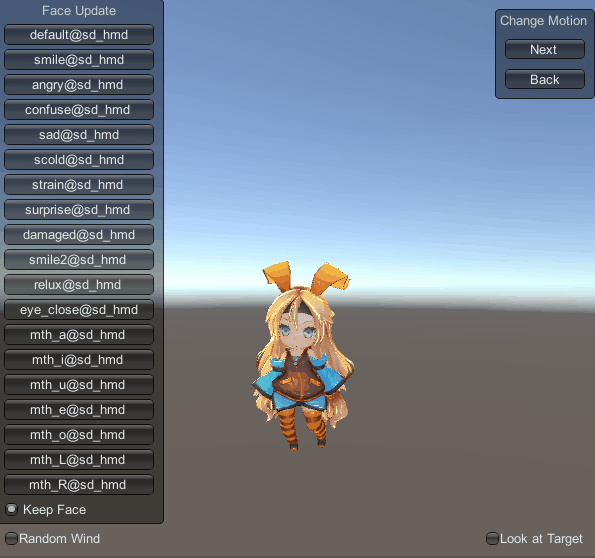
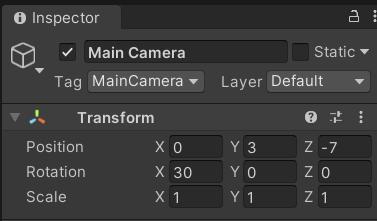
左が[Face Update]、右が[Change Motion]のボタンが並んでいます。残念ながら向こうを向いているので顔の表情がみえません。カメラの位置と向きを変えて見えるようにしました。
ステージを作る
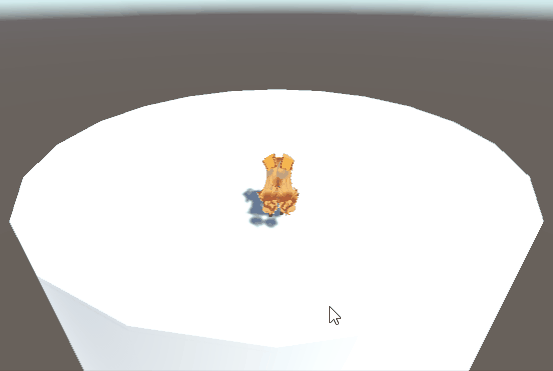
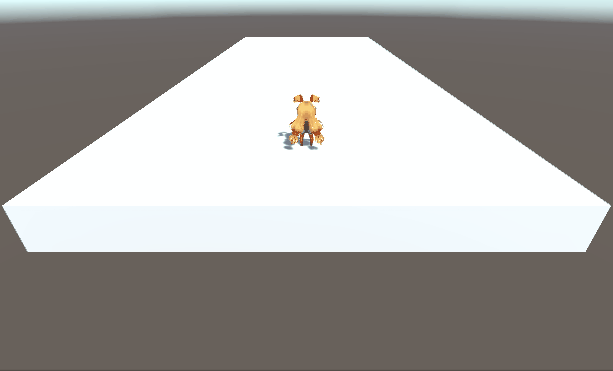
HierarchyでCylinderを追加します。InspectorのTransformでユニティちゃんが動き回れるように位置を下げ広げます。
ボタンを非表示にするためにHierarchyでSD_unitychan_humanoidを選択し、Inspectorで以下のScriptのIs GUIのチェックを外していきます。
- Game view 右上メニュー: Idle Changer (Script) のIs GUI
- ループアニメーションを切り替えるスクリプト
- Game view 左上メニュー: Face Update (Script)のIs GUI
- 顔の表情更新
- Game view 左下チェックボックス: Random Wind (Script)のIs GUI
- Game view 右下チェックボックス: IK Look At(Script)のIs GUI
これで再生してもボタンが表示されなくなりました。
Idle Changer (Script)はup、downのキーでMotionを変更しているのでScript自体のチェックも外します。
C#Scriptで動かす
Assets/Scriptsフォルダを作成し、C#Scriptを生成します。名前はPlayerとします。HierarchyのSD_unitychan_humanoidにアタッチ(Component登録)します。
using UnityEngine;

public class Player : MonoBehaviour
{
    [SerializeField]
    float speed = 5; // Inspectorビューで変更可能
    void Update()
    {
        // 水平方向キー
        float x = Input.GetAxis("Horizontal");
        // 垂直方向キー
        float z = Input.GetAxis("Vertical");
        // 方向
        var direction = new Vector3(x, 0, z);
        // 移動用キーが押されていれば
        if (direction.magnitude > 0)
        {
            // 向きを変える
            transform.rotation = Quaternion.LookRotation(direction);
            // 前に移動する
            transform.Translate(Vector3.forward * Time.deltaTime * speed);
        }
    }
}
向きを変えられるようにしたのでカメラの位置と向きも調整します。
体が動いていないのですべっているように見えます。
モーションを使う
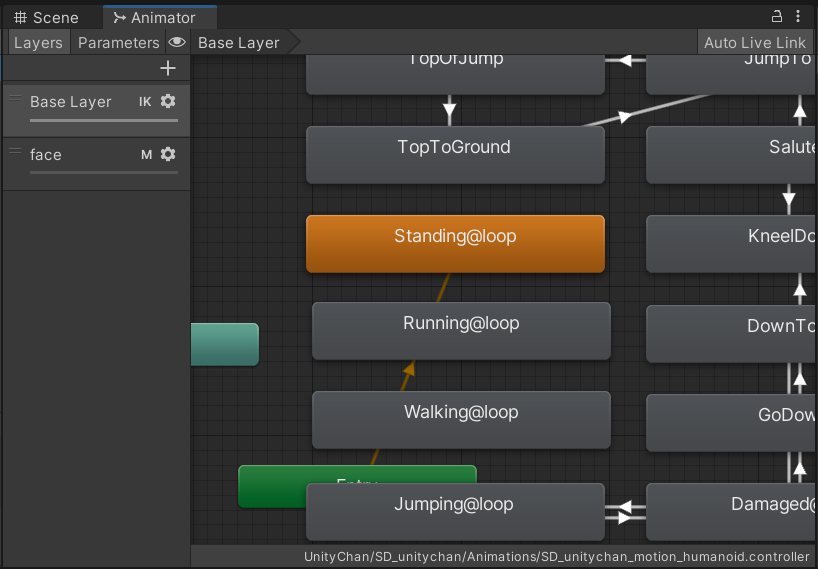
[Window]-[Animation]-[Animator]によりAnimator windowが開きます。HierarchyでSD_unitychan_humanoidを選択します。ユニティちゃん用のanimatorが表示されます。LayersにはBase Layerとfaceレイヤーがあります。

Base LayerのStanding@loopとRunning@Loopを使うので、この二つにつながっている白い線をDeleteします(オレンジの線は残します)。作業しやすいようにWalking@loopとRunning@loopの場所を入れ替えます。
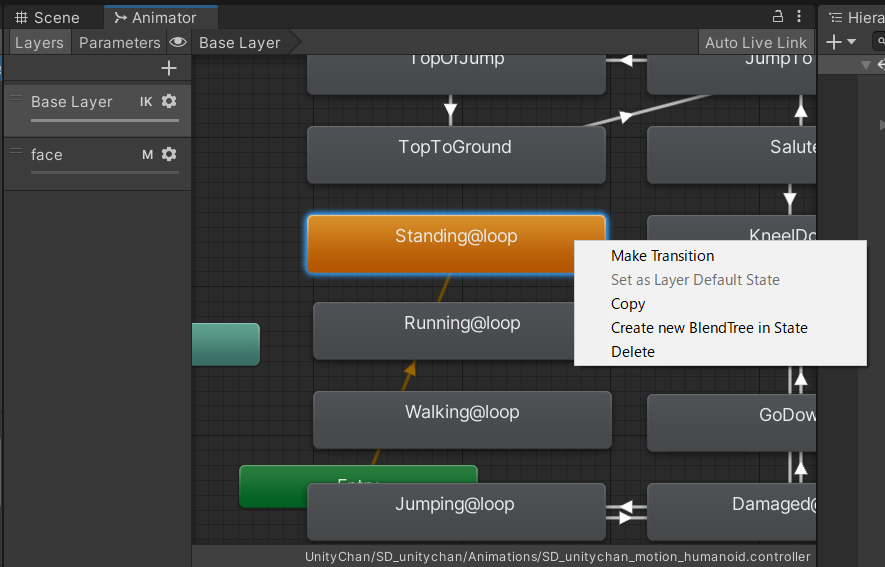
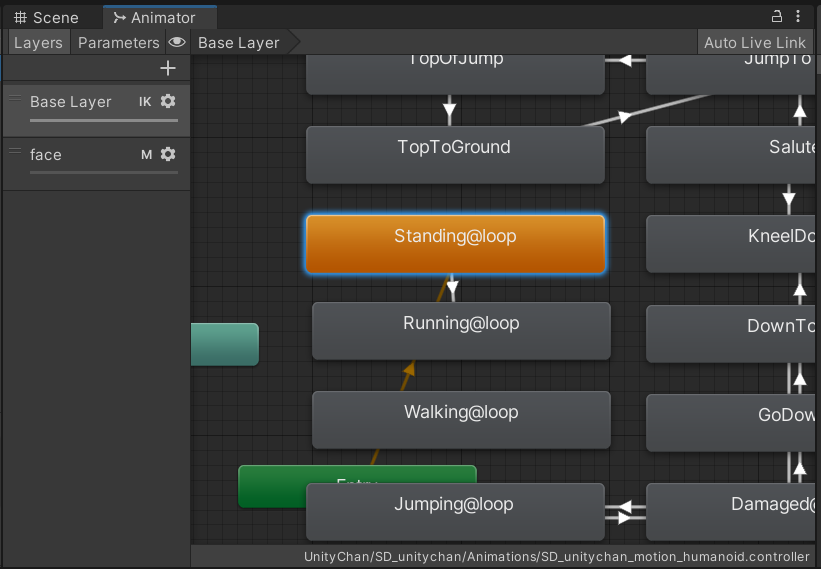
Standing@loopからRunning@loopに白い線を引くためにStanding@loopを選択しコンテキストメニューで[Make Transition]を選択し、次にRunning@loopを選択し白い線を引きます。
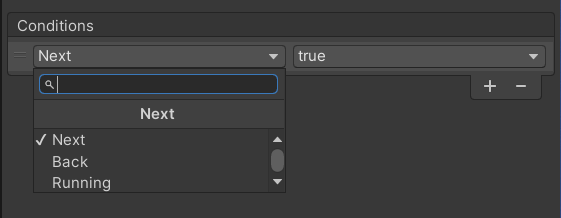
Runningフラグにより遷移するようにするため、Animator windowのParameters タブを開きます。bool Runningを追加するために[+]ボタンからBoolを選択します。

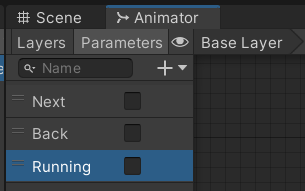
名前をRunningにします。
Standing@loopからRunning@loopへの線を選択した状態でInspector windowをみます。
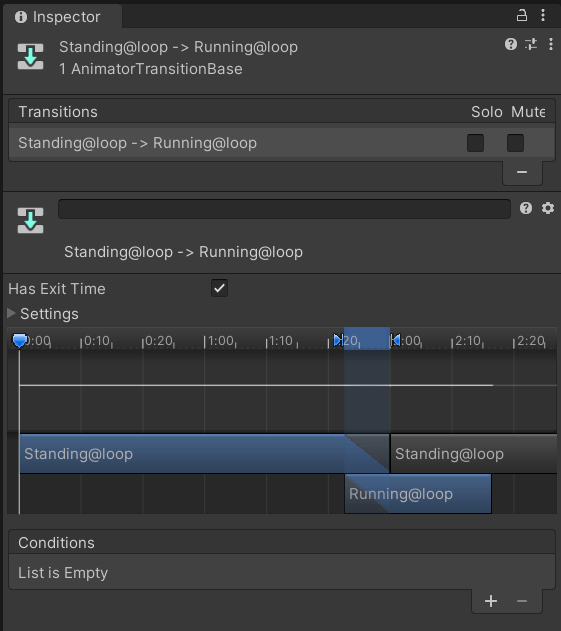
すぐ遷移するよう[Has Exit Time]のチェックを外します。
遷移の条件[Conditions]の中身が空[List is Empty]になっているのでRunningがtrueのときに遷移するように[+]ボタンを押します。
[Conditions]を[Running][true]にします。
同様に[Running@loop]から[Standing@loop]を[Running][false]で遷移させます。
- Running@loopから[Make Transition]でStanding@loopまで白い線を引きます。
- Running@loopからStanding@loopの線を選択しInspector windowの[Conditions]が[List is Empty]になっているので[+]で[Running][false]にします。
- すぐ遷移するよう[Has Exit Time]のチェックを外します。
Player C#ScriptにRunningのtrue, false処理を追加します。
using UnityEngine;

public class Player : MonoBehaviour
{
    [SerializeField]
    float speed = 5; // Inspectorビューで変更可能
    Animator animator;
    bool running; // フィールド
    bool Runing { // プロパティ
        get { return running; }
        set { // 値が異なるセット時のみanimator.SetBoolを呼ぶようにします
            if (value != running)
            {
                running = value;
                animator.SetBool("Running", running);
            }
        }
    }

    private void Start()
    {
        animator = GetComponent<Animator>();
    }
    void Update()
    {
        // 水平方向キー
        float x = Input.GetAxis("Horizontal");
        // 垂直方向キー
        float z = Input.GetAxis("Vertical");
        // 方向
        var direction = new Vector3(x, 0, z);
        // 移動用キーが押されていれば
        if (direction.magnitude > 0)
        {
            // 向きを変える
            transform.rotation = Quaternion.LookRotation(direction);
            // 前に移動する
            transform.Translate(Vector3.forward * Time.deltaTime * speed);
            Runing = true; // プロパティによるセット
        } else
        {
            Runing = false; // プロパティによるセット
        }
    }

}
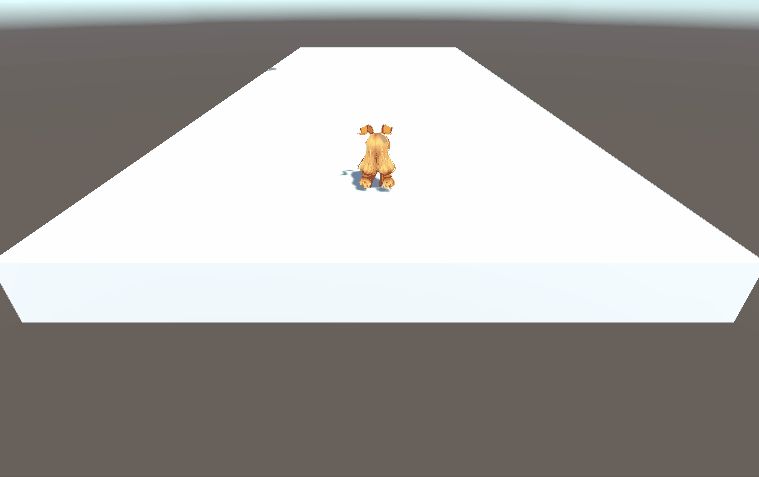
移動キーを押している間Runningモーションになりました。
ゲームにする
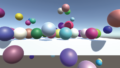
敵を作る
敵を作ってユニティちゃんに向かうようにしましょう。敵といってもShpereですが。Project windowのAssets/Scriptsで敵を生成するEnemyCreatorとShpereにアタッチするEnemyというC#Scriptを生成します。EnemyCreatorはHierarchyのCylinderにアタッチします。
EnemyCreator C#Script
using UnityEngine;

public class EnemyCreator : MonoBehaviour
{
    void Start()
    {
        // 敵のGameObjectを生成する
        var enemy = GameObject.CreatePrimitive(PrimitiveType.Sphere);
        // Enemy C#Scriptをアタッチする
        var enemyScript = enemy.AddComponent<Enemy>();
    }
}
Enemy C#Script
using UnityEngine;

public class Enemy : MonoBehaviour
{
    void Start()
    {
        // Hierarchyで確認しやすいようにnameに設定する。
        name = "Enemy";
        // 上に配置する。
        transform.position = new Vector3(0, 10, 0);
        // 重力で下に落ちるようにする。
        gameObject.AddComponent<Rigidbody>();
    }
}
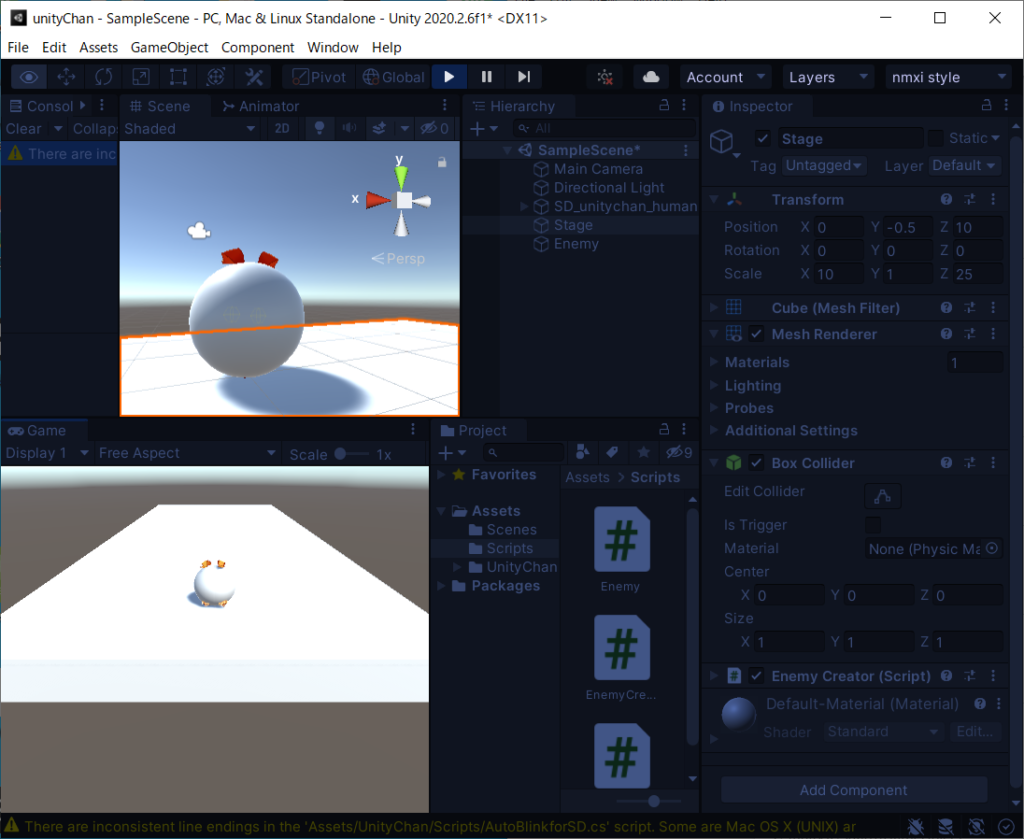
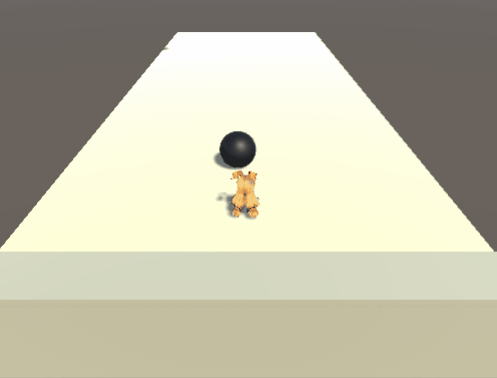
再生するとボールが落ちてきますが、ユニティちゃんの上空で止まってます。HierarchyのCylinderを選択し、InspectorのCapsule Colliderを開くとその上にボールが乗っていることがわかります。
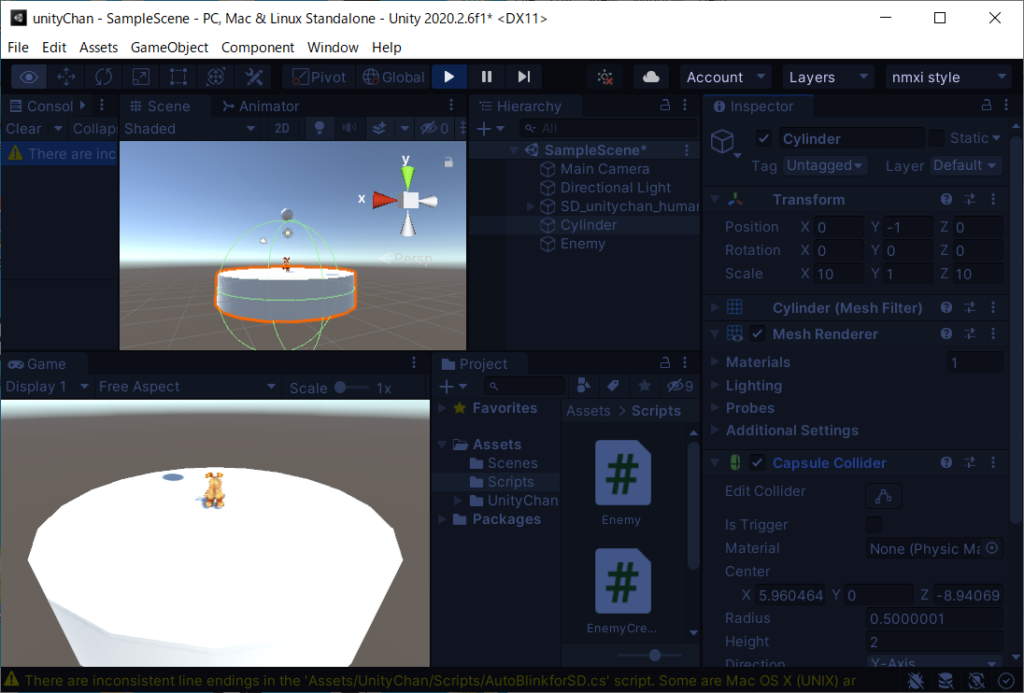
ステージを作り直す
CylinderのColliderはカプセル型なんですね。ここは手っ取り早くステージを変更します。HierarchyCylinderを削除してCubeを生成します。名前をStageにしてTransformも変更します。
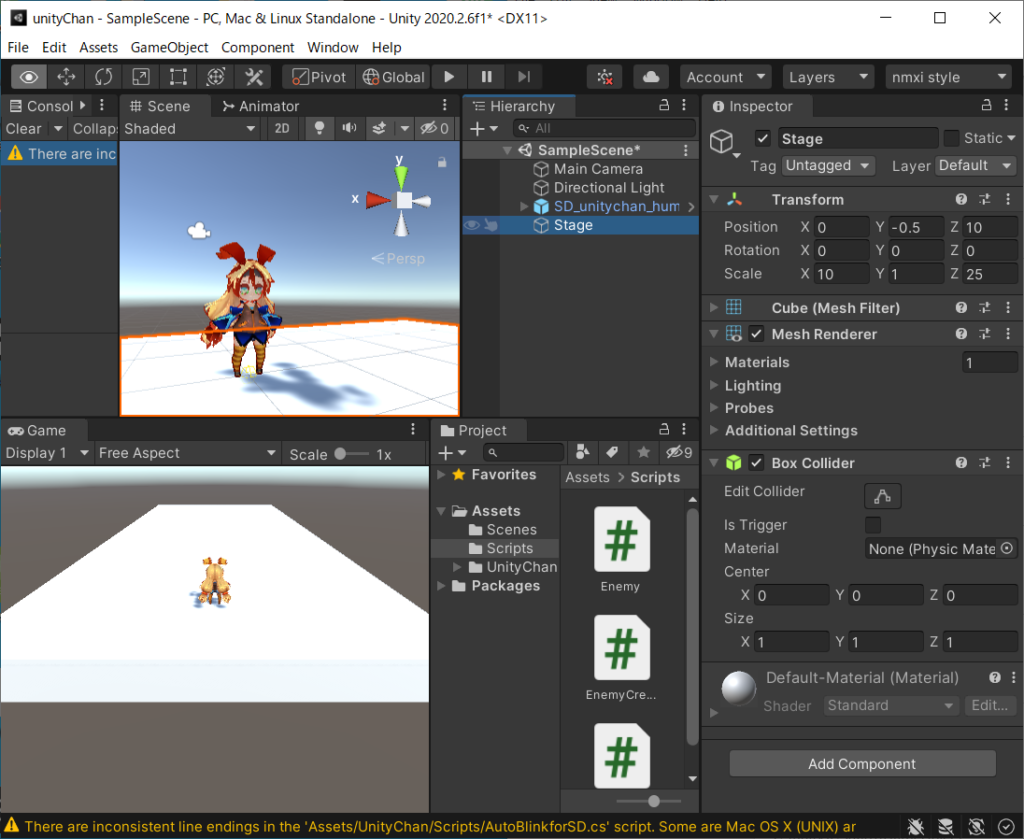
StageにEnemyCreator C#Scriptをアタッチします。再生するとStageまで落ちてくるようになりました。
ユニティちゃんにColliderを設定する
ユニティちゃんがSphereの中にいます。ユニティちゃんにもCollierをつけましょう。HierarchyでSD_unitychan_humanoidを選んでInspectorで[Add Component]ボタンを押し、”Collider”と入力すると候補が出てきます。
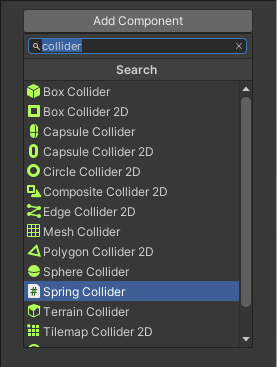
ここではCapsule Colliderを選択します。追加されたCapsule ColliderのEdit Colliderのアイコンを選択すると、Scene viewで緑の線が見えます。
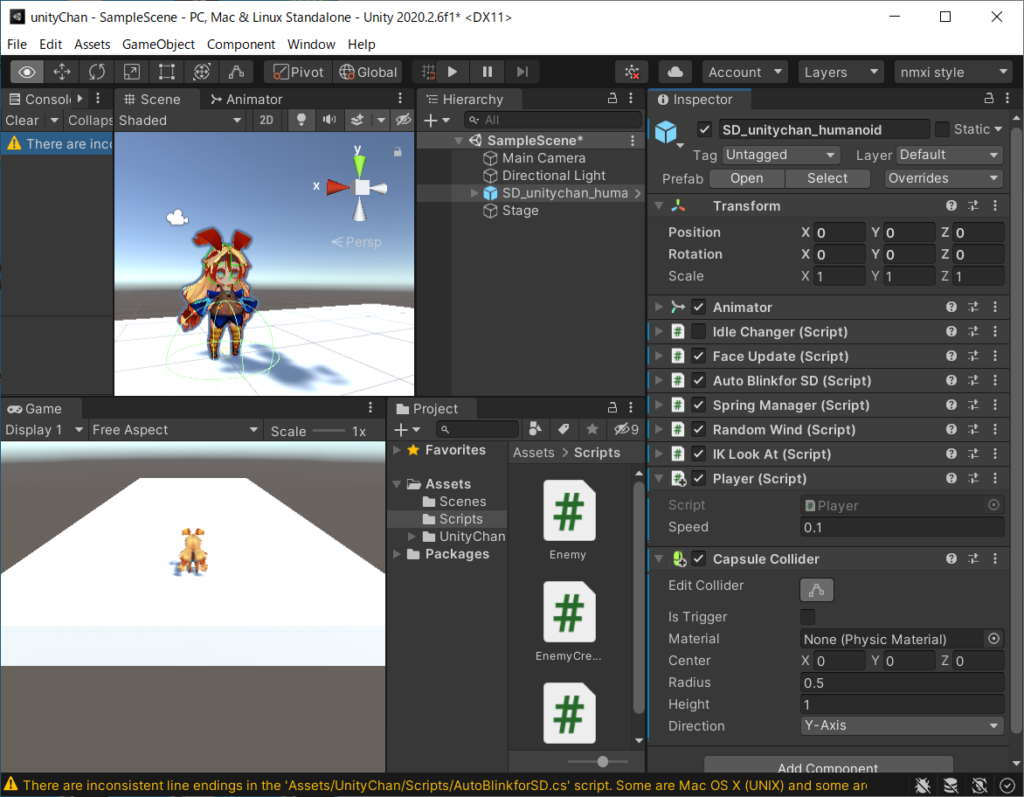
Stageの中に埋まってますね。Capsule ColliderのCenterのYを0.5にするとちょうどよさそうなので0.5にします。
再生するとユニティちゃんの頭の上で止まるようになりました。
敵が近づくようにする
奥の方で生成してユニティちゃんに向かうようにしてみましょう。
EnemyCreator C#Script
using UnityEngine;

public class EnemyCreator : MonoBehaviour
{
    GameObject target;
    void Start()
    {
        // ユニティちゃんをtargetにする
        target = GameObject.Find("SD_unitychan_humanoid");
        AddEnemy();
    }

    void AddEnemy()
    {
        // 敵のGameObjectを生成する
        var enemy = GameObject.CreatePrimitive(PrimitiveType.Sphere);
        // Enemy C#Scriptをアタッチする
        var enemyScript = enemy.AddComponent<Enemy>();
        // targetを設定する
        enemyScript.target = target;
    }
}
Enemy C#Script
using UnityEngine;

public class Enemy : MonoBehaviour
{
    public GameObject target;
    Rigidbody rigid;
    int speed;
    void Start()
    {
        // Hierarchyで確認しやすいようにnameに設定する。
        name = "Enemy";
        // 上に配置する。
        transform.position = new Vector3(Random.Range(-4,4), 10, 10);
        // 重力で下に落ちるようにする。
        rigid = gameObject.AddComponent<Rigidbody>();
        speed = Random.Range(1, 15);
    }

    private void FixedUpdate()
    {
        // targetが設定されていて、stage上にいるときにtargetに向かう
        if (target && transform.position.y > 0 && transform.position.y < 1)
        {
            rigid.AddForce((target.transform.position - transform.position).normalized * speed);
        }
    }
}
追ってくるようになりました。
敵にぶつかったときにモーションをつける
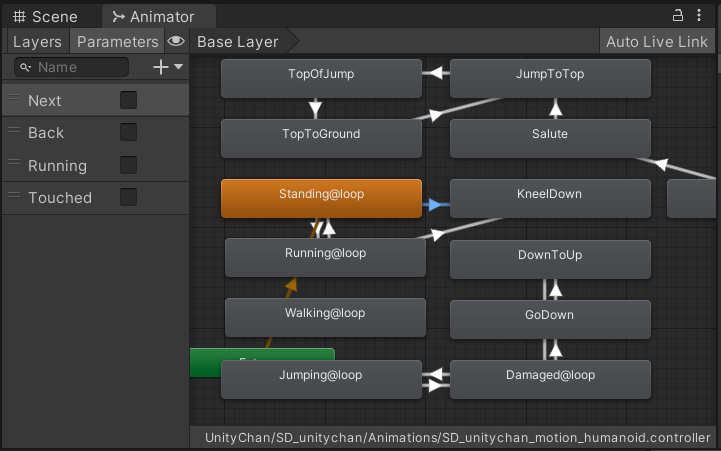
- KneelDownにある白い線を削除します。
- Standing@loopからKneelDownに白い線を引きます。
- Running@loopからKneelDownに白い線を引きます。
- ParametersにBool Touchedを追加します。
- 追加した線をひとつ選択します。
- InspectorでHas Exit TImeのチェックを外します。
- Conditionsを[Touched][true]にします。
- もうひとつの線も同様に設定します。
衝突判定できるようにSD_unitychan_humanoidにRigidbodyを追加します。HierarchyでSD_unitychan_humanoidを選択し、Inspectorの[Add Component]で”Rigidbody”を入力し”Rigidbody”が表示されたら選択します。
Player C# ScriptにOnCollisionEnterメソッドを追加し、敵にぶつかったときの処理を追加します。
using UnityEngine;

public class Player : MonoBehaviour
{
    [SerializeField]
    float speed = 5; // Inspectorビューで変更可能
    Animator animator;
    bool running; // フィールド
    bool Runing { // プロパティ
        get { return running; }
        set { // 値が異なるセット時のみanimator.SetBoolを呼ぶようにします
            if (value != running)
            {
                running = value;
                animator.SetBool("Running", running);
            }
        }
    }

    private void Start()
    {
        animator = GetComponent<Animator>();
    }
    void Update()
    {
        if (touched)
        {
            return;
        }
       // 水平方向キー
        float x = Input.GetAxis("Horizontal");
        // 垂直方向キー
        float z = Input.GetAxis("Vertical");
        // 方向
        var direction = new Vector3(x, 0, z);
        // 移動用キーが押されていれば
        if (direction.magnitude > 0)
        {
            // 向きを変える
            transform.rotation = Quaternion.LookRotation(direction);
            // 前に移動する
            transform.Translate(Vector3.forward * Time.deltaTime * speed);
            Runing = true; // プロパティによるセット
        } else
        {
            Runing = false; // プロパティによるセット
        }
    }
    bool touched;
    private void OnCollisionEnter(Collision collision)
    {
        if (!touched && collision.gameObject.name == "Enemy")
        {
            // playerが物理的に動かないようにする
            var rigid = GetComponent<Rigidbody>();
            rigid.velocity = Vector3.zero;
            rigid.constraints = RigidbodyConstraints.FreezeRotation;

            // Touchedモーションする
            touched = true;
            animator.SetBool("Touched", touched);
        }
    }
}
Enemy C#Script ぶつかったことがわかりやすいように色を変えます。
using UnityEngine;

public class Enemy : MonoBehaviour
{
    public GameObject target;
    Rigidbody rigid;
    int speed;
    MeshRenderer meshMaterial;
    Material material;
    Color normalColor = Color.black;
    Color catchColor = Color.red;
    Color touchColor = Color.grey;
    void Start()
    {
        // Hierarchyで確認しやすいようにnameに設定する。
        name = "Enemy";
        // 上に配置する。
        transform.position = new Vector3(Random.Range(-4,4), 10, 10);
        // 重力で下に落ちるようにする。
        rigid = gameObject.AddComponent<Rigidbody>();

        // 速度をランダムにする。
        speed = Random.Range(1, 15);

        // 色を変える
        material = gameObject.GetComponent<MeshRenderer>().material;
        SetColor(normalColor);
    }

    private void FixedUpdate()
    {
        // targetが設定されていて、stage上にいるときにtargetに向かう
        if (target && transform.position.y > 0 && transform.position.y < 1)
        {
            rigid.AddForce((target.transform.position - transform.position).normalized * speed);
        }
    }
    private void OnCollisionEnter(Collision collision)
    {
        // targetとそれ以外で色を変える
        SetColor(collision.gameObject.name == target.name ? catchColor : touchColor);
        Invoke("Reset", 1);
    }
    private void Reset()
    {
        SetColor(normalColor);
    }
    void SetColor(Color color)
    {
        material.color = color;
    }
}
敵を量産する
using UnityEngine;

public class EnemyCreator : MonoBehaviour
{
    GameObject target;
    void Start()
    {
        // ユニティちゃんをtargetにする
        target = GameObject.Find("SD_unitychan_humanoid");
        AddEnemy();
    }

    void AddEnemy()
    {
        // 敵のGameObjectを生成する
        var enemy = GameObject.CreatePrimitive(PrimitiveType.Sphere);
        // Enemy C#Scriptをアタッチする
        var enemyScript = enemy.AddComponent<Enemy>();
        // targetを設定する
        enemyScript.target = target;

        // 3秒後に再帰呼び出しする
        Invoke("AddEnemy", 3);
    }
}

敵のインスタンスをPoolする
敵をどんどん生産しているので使用メモリを増やし続けています。不要になった敵インスタンスを再利用して使用メモリが増えないようにします。
EnemyCreator C#ScriptでEnemy GameObject再利用のためのPoolを作ります。
using System.Collections.Generic;
using UnityEngine;

public class EnemyCreator : MonoBehaviour
{
    GameObject target;
    // Enemy GameObjectを再利用するためのPool
    Stack<GameObject> pool = new Stack<GameObject>();

    void Start()
    {
        // ユニティちゃんをtargetにする
        target = GameObject.Find("SD_unitychan_humanoid");
        AddEnemy();
    }

    void AddEnemy()
    {
        if (pool.Count > 0)
        {
            // 再利用できるものがあれば再利用する
            pool.Pop().SetActive(true);
        }
        else
        {
            // 再利用するものがなければ生成する

            // 敵のGameObjectを生成する
            var enemy = GameObject.CreatePrimitive(PrimitiveType.Sphere);
            // Enemy C#Scriptをアタッチする
            var enemyScript = enemy.AddComponent<Enemy>();
            // targetを設定する
            enemyScript.target = target;
            enemyScript.SetDisableCallBack(EnemyDisabled);
        }

        // 3秒後に再帰呼び出しする
        Invoke("AddEnemy", 3);
    }
    private void EnemyDisabled(GameObject enemy)
    {
        pool.Push(enemy);
    }
}
Enemy C#Scriptで画面から消えたときに非アクティブにします。非アクティブになるとOnDisable()が呼ばれるのでEnemyCreatorにCallBackして知らせます。
using UnityEngine;

public class Enemy : MonoBehaviour
{
    public GameObject target;
    Rigidbody rigid;
    int speed;
    Material material;
    Color normalColor = Color.black;
    Color catchColor = Color.red;
    Color touchColor = Color.grey;

    private void OnEnable()
    {
        // 上に配置する。
        transform.position = new Vector3(Random.Range(-4, 4), 10, 10);

        // 速度をランダムにする。
        speed = Random.Range(1, 15);

        // 色を変える
        material = gameObject.GetComponent<MeshRenderer>().material;
        SetColor(normalColor);
    }
    void Start()
    {
        // Hierarchyで確認しやすいようにnameに設定する。
        name = "Enemy";

        // 重力で下に落ちるようにする。
        rigid = gameObject.AddComponent<Rigidbody>();
    }

    private void FixedUpdate()
    {
        // targetが設定されていて、stage上にいるときにtargetに向かう
        if (target && transform.position.y > 0 && transform.position.y < 1)
        {
            rigid.AddForce((target.transform.position - transform.position).normalized * speed);
        }
    }
    private void OnCollisionEnter(Collision collision)
    {
        // targetにぶつかった色を優先する
        if (collision.gameObject.name == target.name)
        {
            SetColor(catchColor);
        } else if (material.color != catchColor)
        {
            SetColor(touchColor);
        }
        // 一秒後に通常の色に戻す
        Invoke("Reset", 1);
    }
    private void Reset()
    {
        SetColor(normalColor);
    }
    void SetColor(Color color)
    {
        material.color = color;
    }

    public void SetDisableCallBack(System.Action<GameObject> action)
    {
        disableAction = action;
    }
    System.Action<GameObject> disableAction;
    private void OnBecameInvisible()
    {
        gameObject.SetActive(false);
    }
    private void OnDisable()
    {
        if (disableAction != null)
        {
            disableAction(this.gameObject);
        }
    }
}
難易度を上げる
手前の方に立っていてよけるとすぐ敵が落ちるのでそこから落ちないようにします。
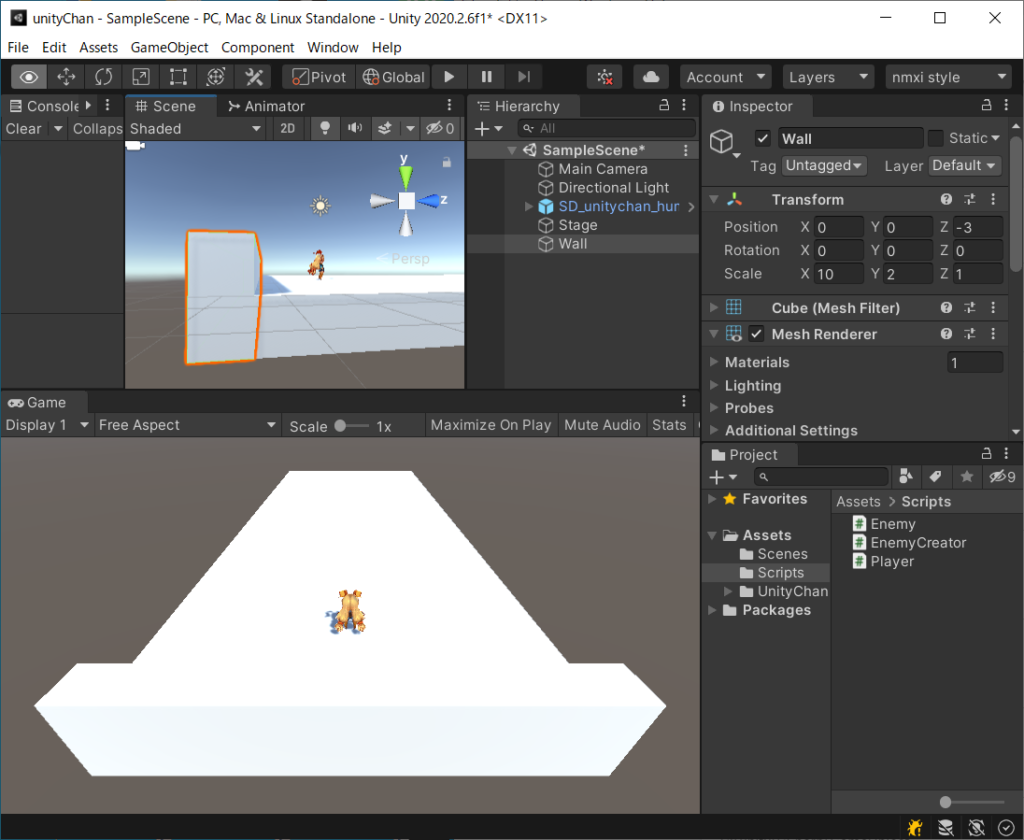
Cubeを生成し、名前をWallとします。Transformで位置と大きさを変更します。

カメラの位置も変更します。
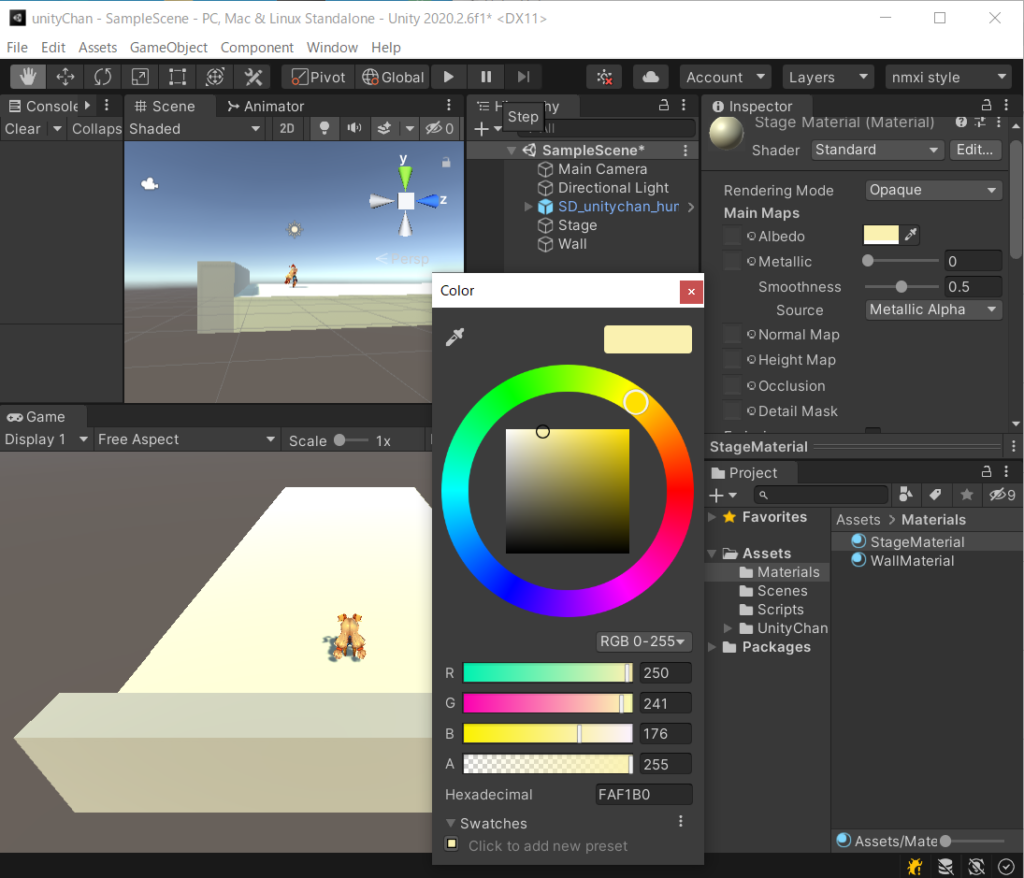
白すぎてわかりづらいのでStageとWallに色をつけます。ProjectでAssets/Materialsフォルダを作成します。[Create]-[Materials]でMaterialsを二つ作成し、名前をStageMaterialとWallMaterialにします。作成したMaterialを選択し、InspectorのAlbedoで色を変更します。
Playerが倒れたときに敵の生成を止める
Player.OnCollisionEnter()で敵にぶつかったときEnemyCreator.Stop()を呼び、敵の生成を止めるようにします。小さなプロジェクトではPlayerとEnemyCreatorを直接関連付けてもかまいませんが、規模が大きなプロジェクトになると各モジュールの依存関係をできるだけ排除し、疎結合とすることで変更に強い構造になります。
ここでは、Player(Script)とEnemyCreator(Script)を疎結合とするためGameEventとGameEventListenerを導入します。GameEventとGameEventListenerは次のページで紹介されています。
C#Script GameEventを追加します。基底クラスはScriptableObjectです。[CreateAssetMenu]属性によりAssetsメニューから生成できるようになります。
using System.Collections.Generic;
using UnityEngine;

[CreateAssetMenu]
public class GameEvent : ScriptableObject
{
	private List<GameEventListener> listeners =	new List<GameEventListener>();

	public void Raise()
	{
		for (int i = listeners.Count - 1; i >= 0; i--)
		{
			listeners[i].OnEventRaised();
		}
	}

	public void RegisterListener(GameEventListener listener)
	{
		listeners.Add(listener);
	}

	public void UnregisterListener(GameEventListener listener)
	{
		listeners.Remove(listener);
	}
}
GameEventListenerはUnityEventを持つEvent Listenerです。GameEvent EventフィールドにはInspectorでアタッチします。GameEventListnerをGameObjectに[Add Component]することでInspectorでUnityEvent Responseフィールドも設定できるようになります。
using UnityEngine;
using UnityEngine.Events;

public class GameEventListener : MonoBehaviour
{
    public GameEvent Event;
    public UnityEvent Response;

    private void OnEnable()
    {
        Event.RegisterListener(this);
    }

    private void OnDisable()
    {
        Event.UnregisterListener(this);
    }

    public void OnEventRaised()
    {
        Response.Invoke();
    }
}
Player(Script)にGameEvent downを追加します。OnCollisionEnter()で敵にぶつかったときにdown.Raise()を呼びます。
using UnityEngine;

public class Player : MonoBehaviour
{
    [SerializeField]
    float speed = 5; // Inspectorビューで変更可能
    Animator animator;
    bool running; // フィールド
    bool Runing { // プロパティ
        get { return running; }
        set { // 値が異なるセット時のみanimator.SetBoolを呼ぶようにします
            if (value != running)
            {
                running = value;
                animator.SetBool("Running", running);
            }
        }
    }

    [SerializeField]
    GameEvent down; // Inspectorビューで設定

    private void Start()
    {
        animator = GetComponent<Animator>();
    }
    void Update()
    {
        if (touched)
        {
            return;
        }

        // 水平方向キー
        float x = Input.GetAxis("Horizontal");
        // 垂直方向キー
        float z = Input.GetAxis("Vertical");
        // 方向
        var direction = new Vector3(x, 0, z);
        // 移動用キーが押されていれば
        if (direction.magnitude > 0)
        {
            // 向きを変える
            transform.rotation = Quaternion.LookRotation(direction);
            // 前に移動する
            transform.Translate(Vector3.forward * Time.deltaTime * speed);
            Runing = true; // プロパティによるセット
        } else
        {
            Runing = false; // プロパティによるセット
        }
    }
    bool touched;
    private void OnCollisionEnter(Collision collision)
    {
        if (!touched && collision.gameObject.name == "Enemy")
        {
            down.Raise();

            // playerが物理的に動かないようにする
            var rigid = GetComponent<Rigidbody>();
            rigid.velocity = Vector3.zero;
            rigid.constraints = RigidbodyConstraints.FreezeRotation;

            // Touchedモーションする
            touched = true;
            animator.SetBool("Touched", touched);
        }
    }
}
EnemyCreatorにStop()メソッドを追加し、敵の生成を止めるようにします。Inspector上でGameEventListerにEnemyCreator.Stop()を登録します。
using System.Collections.Generic;
using UnityEngine;

public class EnemyCreator : MonoBehaviour
{
    // 敵が向かうターゲット
    GameObject target;
    // Enemy GameObjectを再利用するためのPool
    Stack<GameObject> pool = new Stack<GameObject>();
    void Start()
    {
        // ユニティちゃんをターゲットにする
        target = GameObject.Find("SD_unitychan_humanoid");
        // 敵を生成する
        AddEnemy();
    }
    bool stop;
    public void Stop()
    {
        stop = true;
        pool.Clear();
    }

    void AddEnemy()
    {
        if (stop)
        {
            return;
        }
        if (pool.Count > 0)
        {
            // 再利用できるものがあれば再利用する
            pool.Pop().SetActive(true);
        }
        else
        {
            // 再利用するものがなければ生成する

            // 敵のGameObjectを生成する
            var enemy = GameObject.CreatePrimitive(PrimitiveType.Sphere);
            // Enemy C#Scriptをアタッチする
            var enemyScript = enemy.AddComponent<Enemy>();
            // ターゲットを設定する
            enemyScript.target = target;
            // EnemyがDisableになったときのコールバックを設定する
            enemyScript.SetDisableCallBack(EnemyDisabled);
        }

        // 3秒後に再帰呼び出しする
        Invoke("AddEnemy", 3);
    }
    private void EnemyDisabled(GameObject enemy)
    {
        pool.Push(enemy);
    }
}
次のシーケンスように処理がすすむように関連付けを行います。
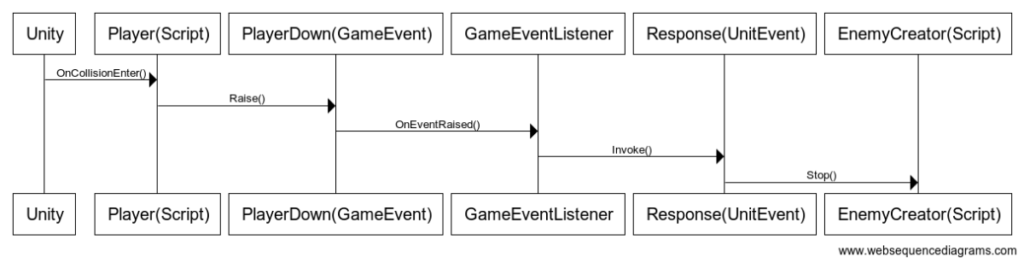
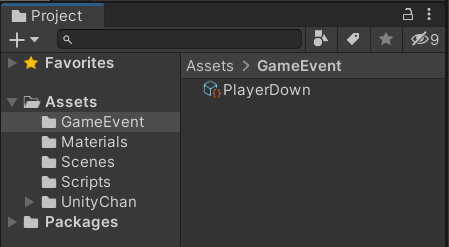
ProjectのAssets/GameEventフォルダを作成し、[Assets]-[Create]-[Game Event]でGame Eventを生成します。名前をPlayerDownとします。

HierarchyのSD_unitychan_humanoidを選択し、InspectorのPlayer(Script)のDownにPlayerDown (Game Event)を設定します。Player C#Scriptでイベント発行しているので、Playerが倒れたときにPlayerDownイベントが発行されます。
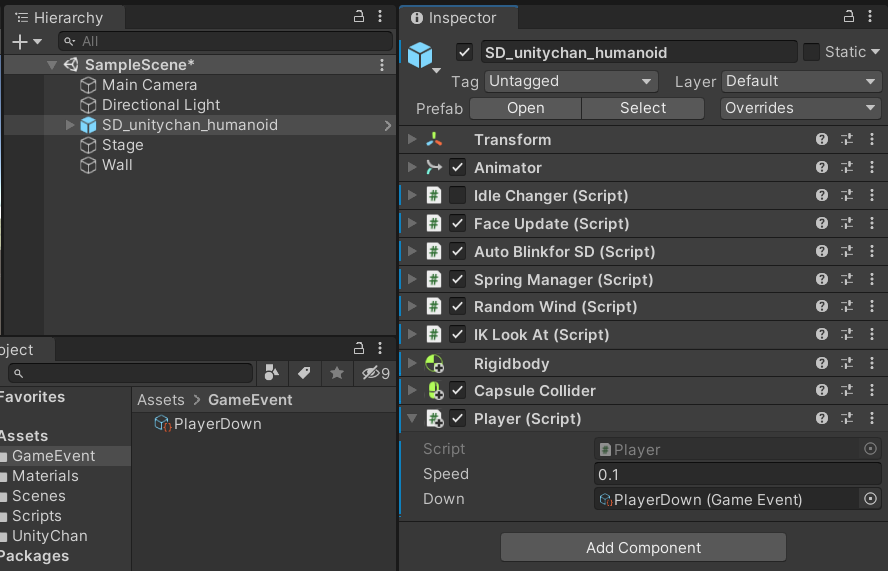
これで、Player(Script)のOnCollisionEnter()で敵にぶたかったときにPlayerDown(GameEvent)のRaise()を呼び出すことができます。
HierarchyのStageを選択し、Inspectorで[Add Component]によりGame Event Lister (Script) Componetを追加します。EventにPlayDown (Game Event)を設定し、Response()にStage GameObjectをドラッグ&ドロップし、EnemyCreator.Stopを選択します。

これで、PlayerDown(GameEvent)からGameEventListenerのOnEventRaise()を呼ぶことができ、Response(UnityEvent)に登録されたEnemyCreator.Stop()を呼ぶことができます。
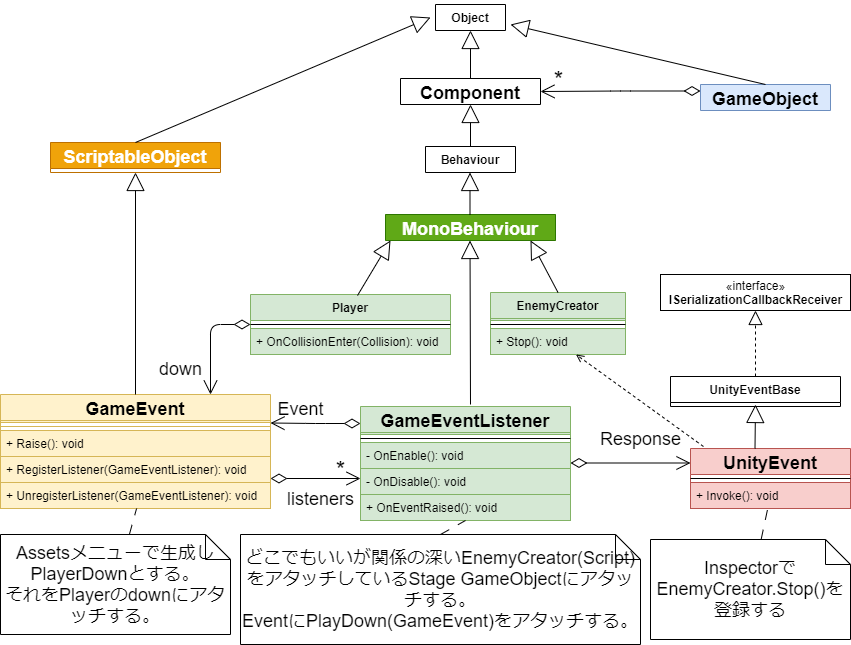
Player(Script)とEnemyCreator(Script)は直接の関連性はなく、GameEventを通して呼び出すことができます。
これでPlayerが倒れたときにStop()が呼ばれるようになったので敵の生成が止まります。

コメント