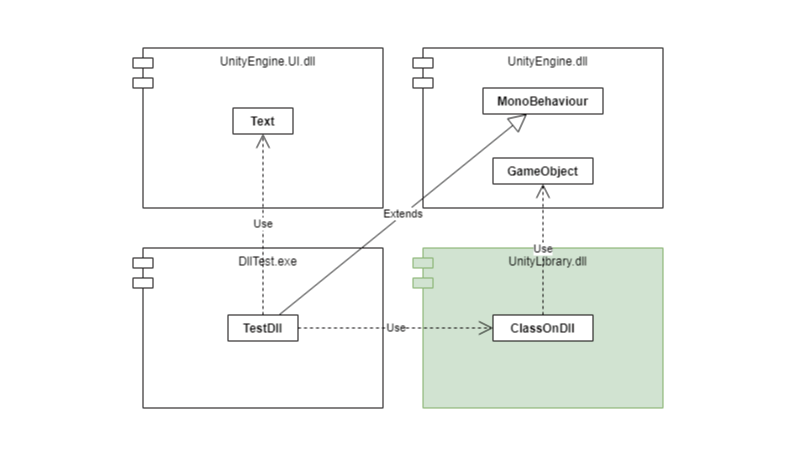
特に必要性を感じていないですが、dllを作って使えるみたいなので試してみました。
準備する
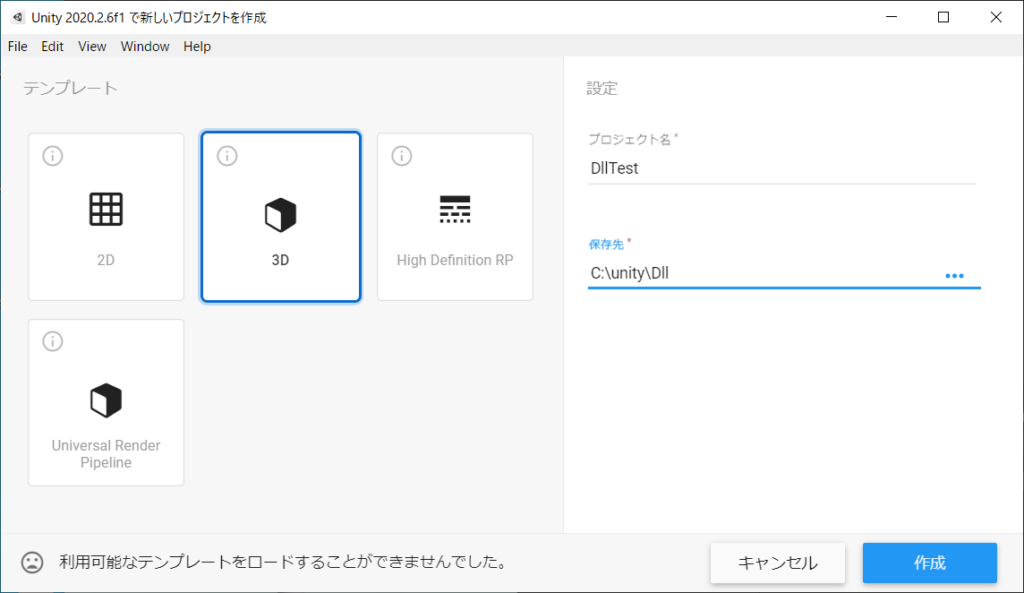
Unityのプロジェクトを作成する
確認用Textを配置する
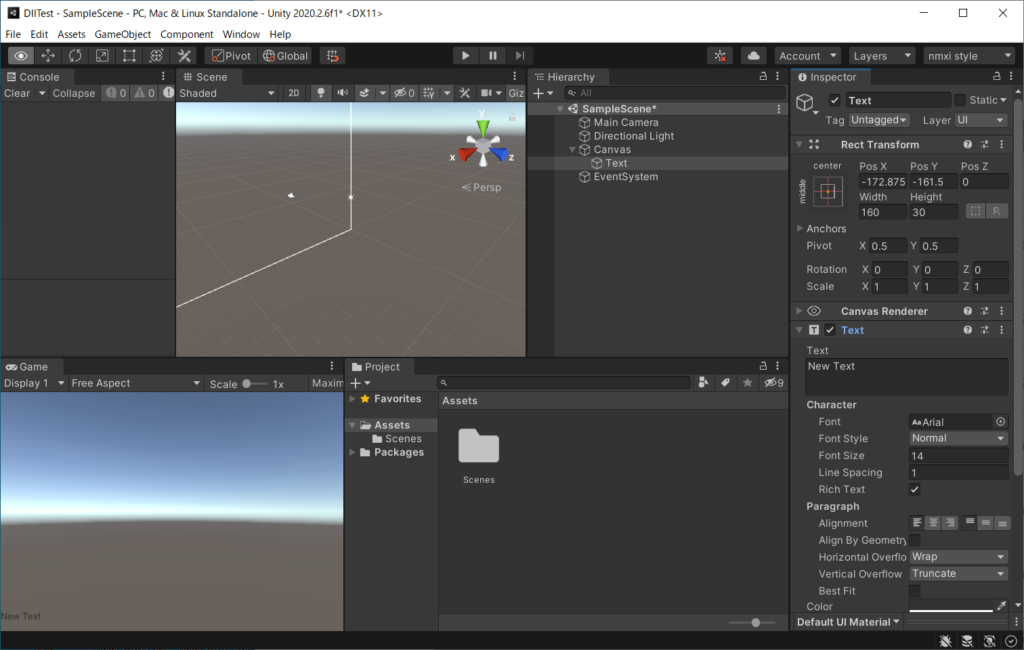
Layoutはnmxi styleにしています。
Hierarchyで[UI]-[Text]を作成します。
Textの設定をGame Viewで見やすいように変更します。
C#Scriptを作成する
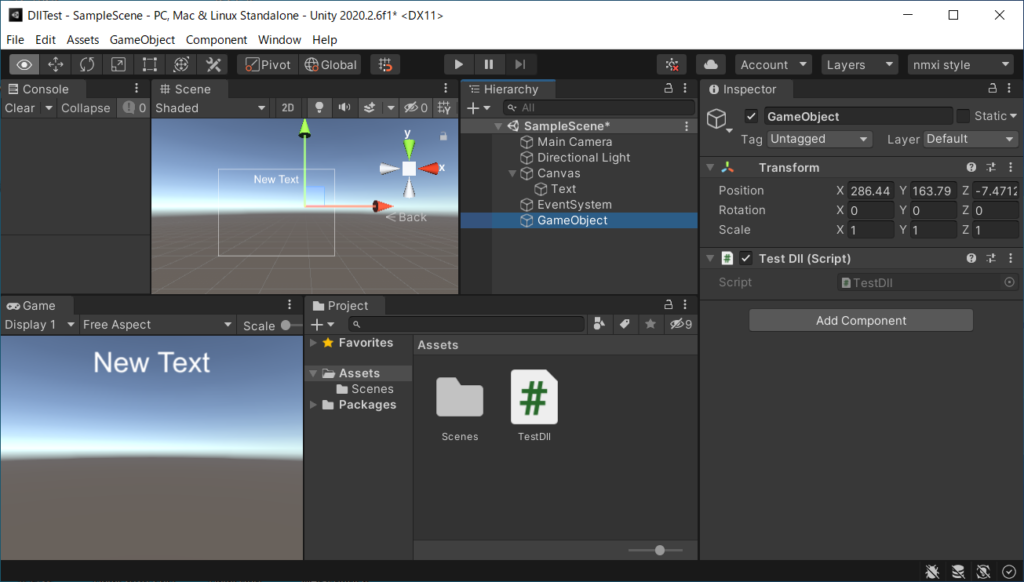
ProjectでC#Scriptを作成してTestDllという名前にします。
HierarchyのCreate EmptyメニューでGameObjectを作成します。
TestDll C# ScriptをGameObjectにアタッチします。
TestDll C#ScriptをダブルクリックするとVisual Studioが起動します。
using UnityEngine;
using UnityEngine.UI;

public class TestDll : MonoBehaviour
{
    [SerializeField]
    Text text; // Inspectorからアタッチ
    void Start()
    {
        text.text = "Hello!";
    }
}
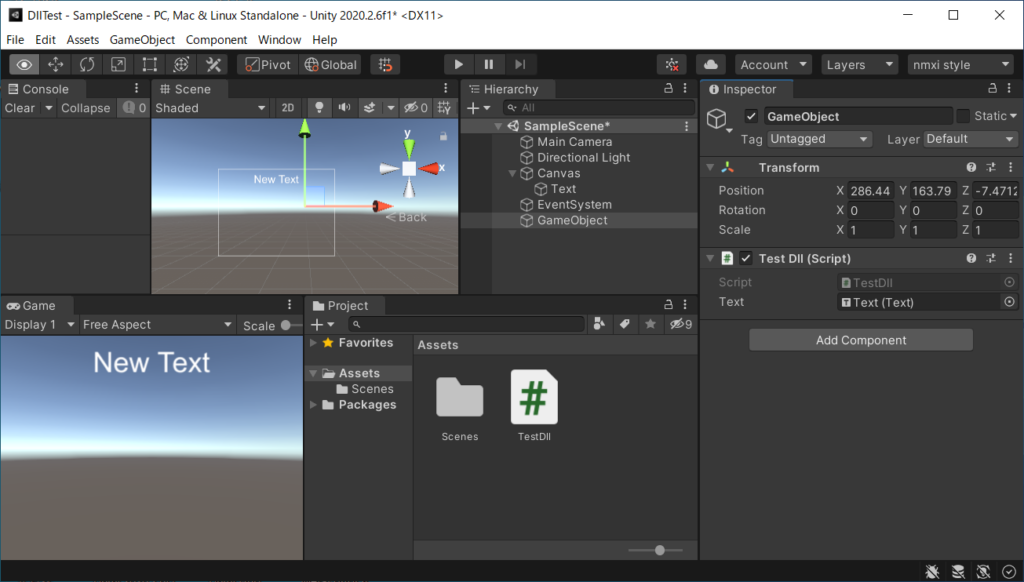
GameObjectのInspectorでTest Dll (Script)のTextにText GameObjectをアタッチします。
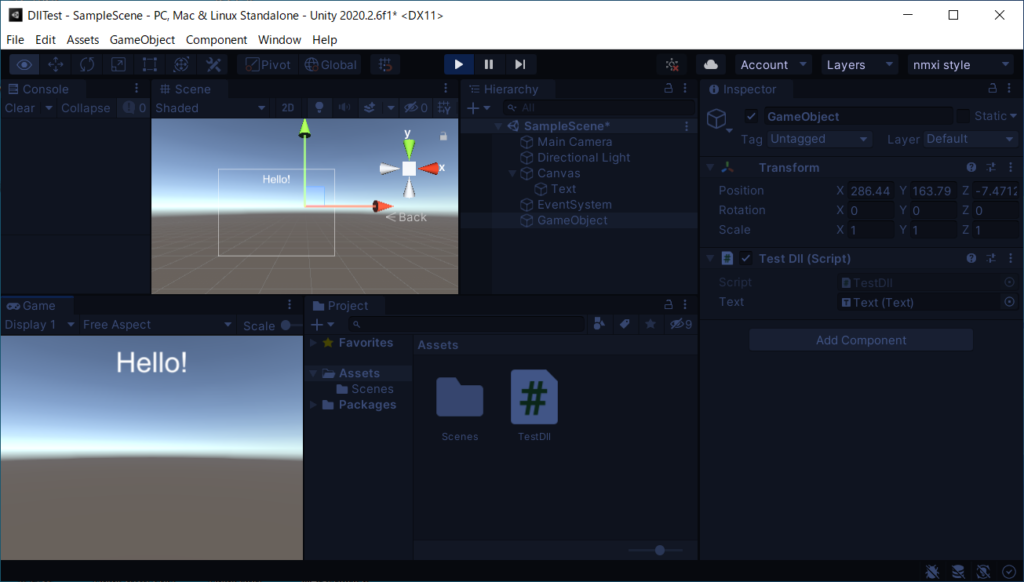
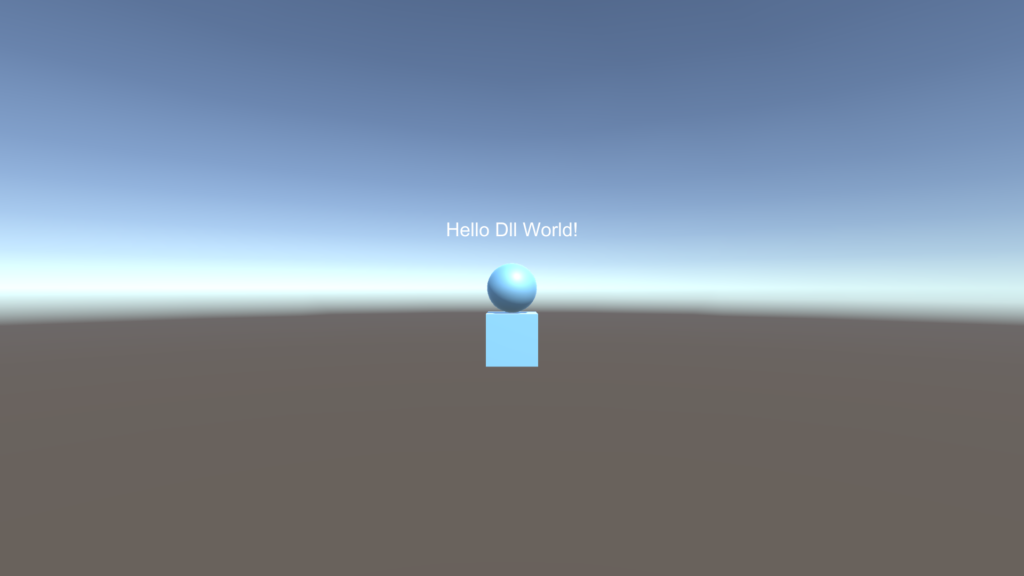
Playボタンを押すとTextが”Hello!”になります。
Dllを作成する
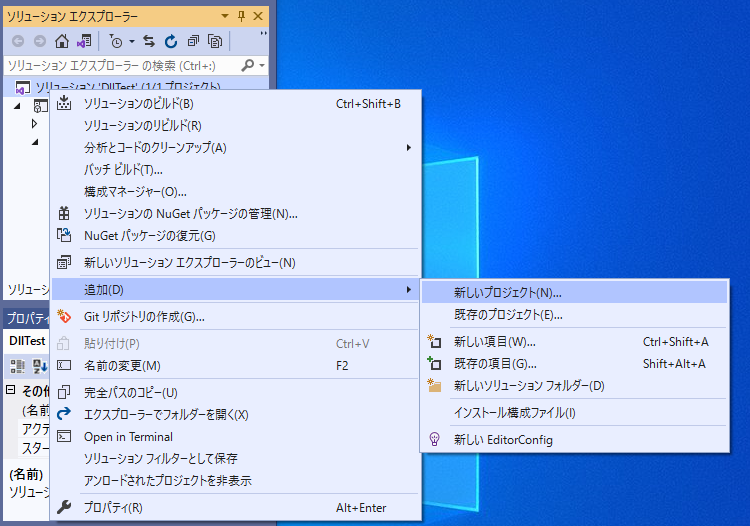
Visual Studioでクラスライブラリプロジェクトを作成する
Visual Studioのソリューション エクスプローラーでソリューションのコンテキストメニュー[追加]-[新しいプロジェクト]を選択します。
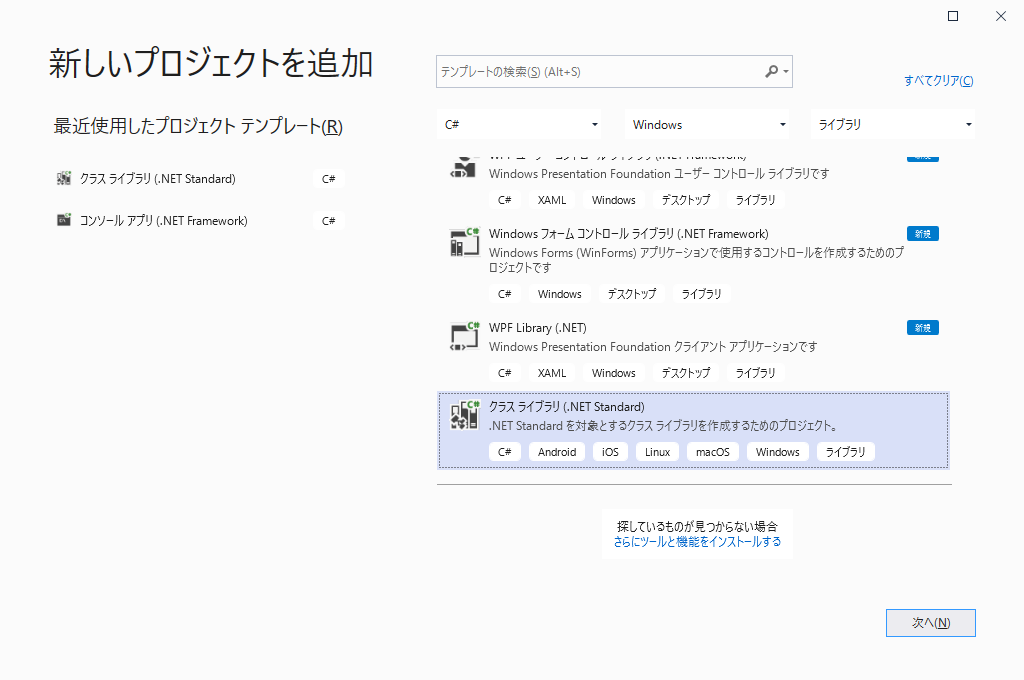
クラスライブラリ (.NET Standard)を選択して[次へ]ボタンを押します。
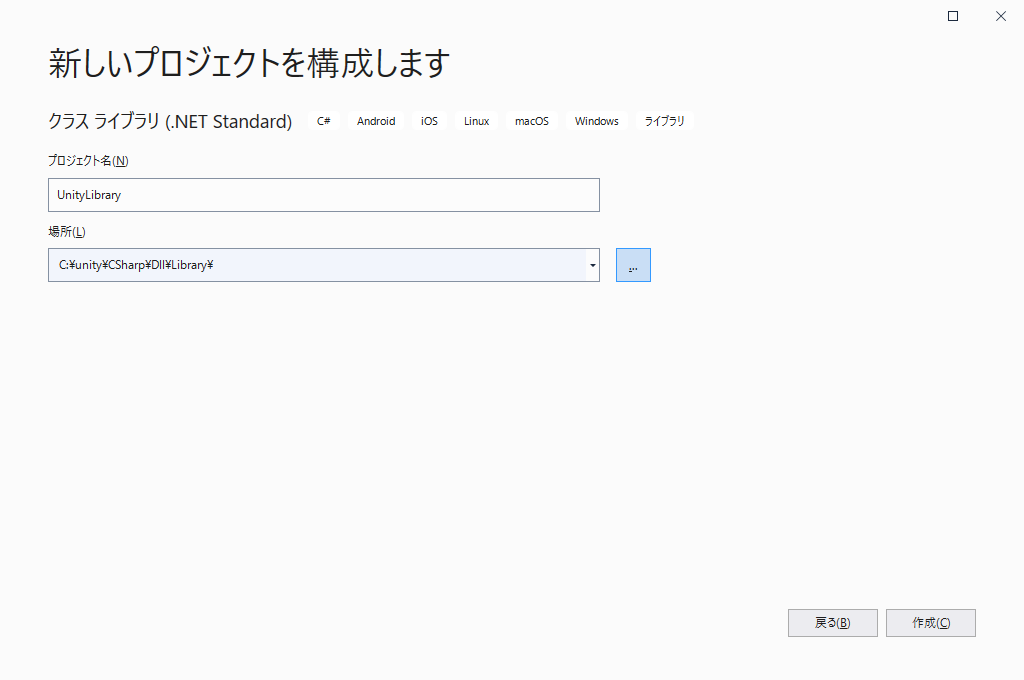
プロジェクト名と場所を指定して[作成]ボタンを押します。
C#のコードを書く
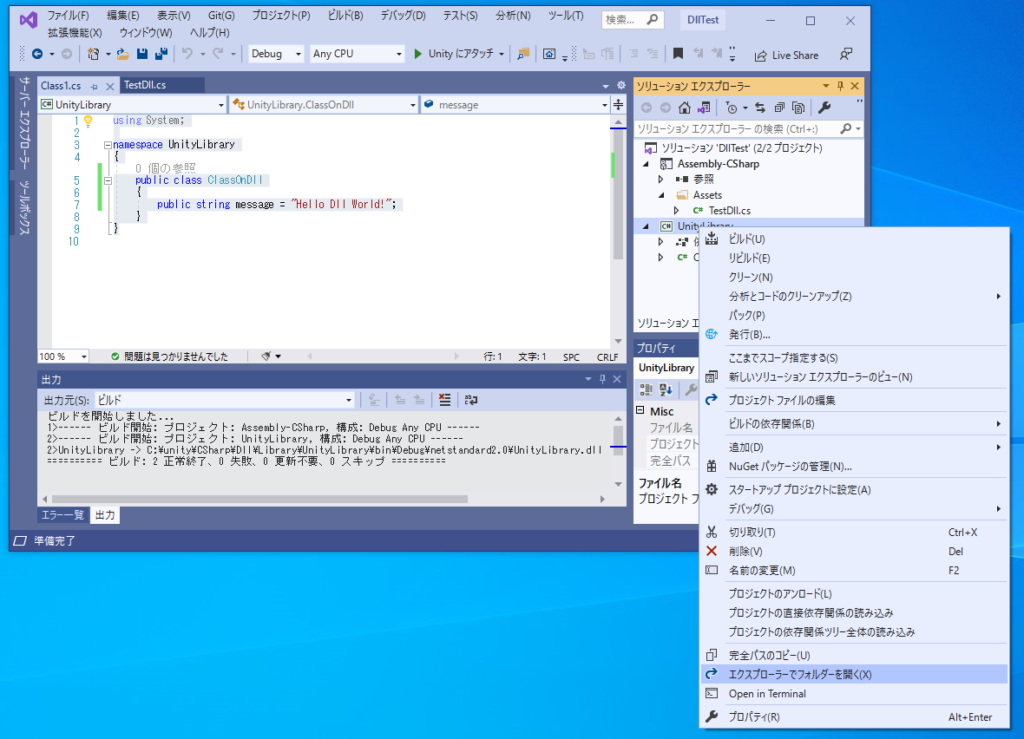
ファイル名をClassOnDll.csとし次のコードを書きます。
using System;

namespace UnityLibrary
{
    public class ClassOnDll
    {
        public string message = "Hello Dll World!";
    }
}
ビルドする
コードを書いて[ビルド]-[ソリューションのビルド]メニューでビルドします。
できたdllをUnit Editorにドラッグ&ドロップする
エクスプローラを開きbin/Debug/netstandard2.0フォルダに移動します。
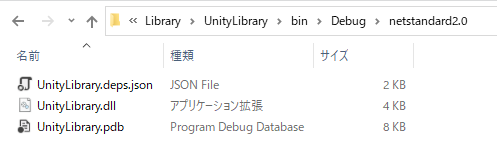
dllファイルをUnity EditorのProject windowのAssetsのドラッグ&ドロップします。
Dllのクラスを使ってみる
TestDllからClassOnDllを使ってみます。
using UnityEngine;
using UnityEngine.UI;
using UnityLibrary;

public class TestDll : MonoBehaviour
{
    [SerializeField]
    Text text; // Inspectorからアタッチ
    void Start()
    {
        var classOnDll = new ClassOnDll();
        text.text = classOnDll.message;
    }
}
結果を確認する
Playボタンを押します。
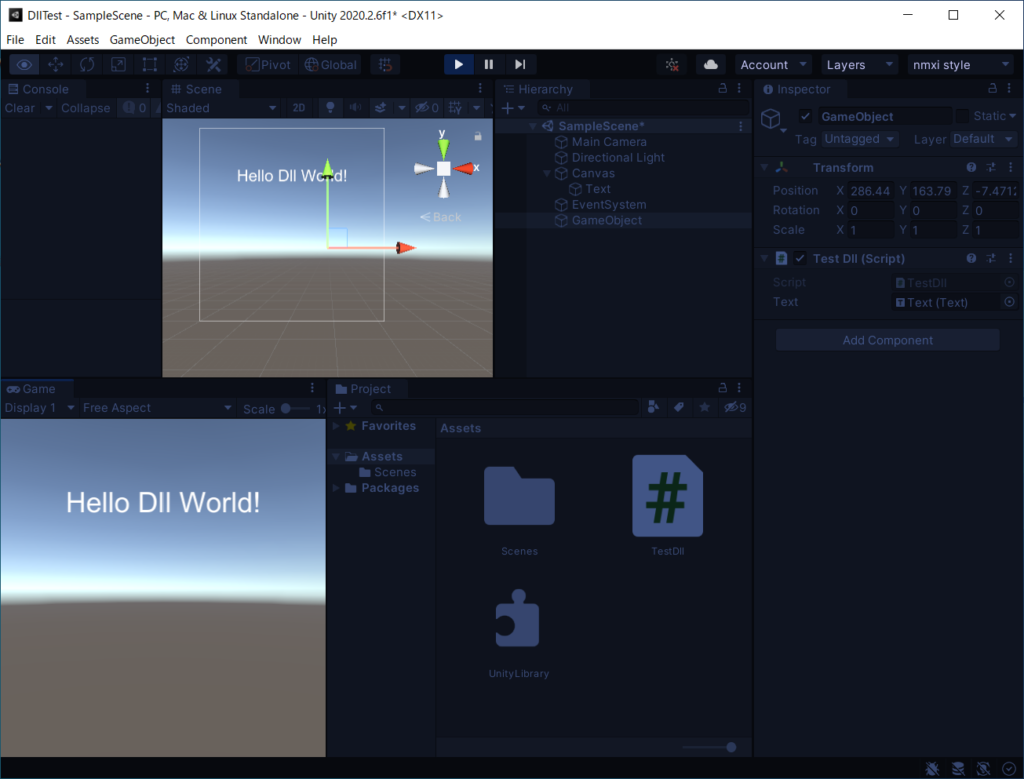
dllのClassOnDllから取得した文字列が表示されました。
DllでUnityEngineを使う
純粋なC#は使えたので、UnityEngineも使えるか確認します。
参照を追加する
Visual Studioのソリューション エクスプローラのUnityLibraryプロジェクトの依存関係のコンテキストメニューから[プロジェクト参照の追加]を選択します。
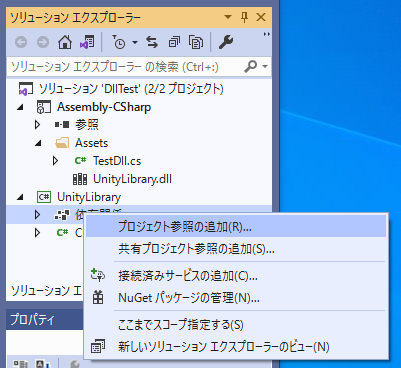
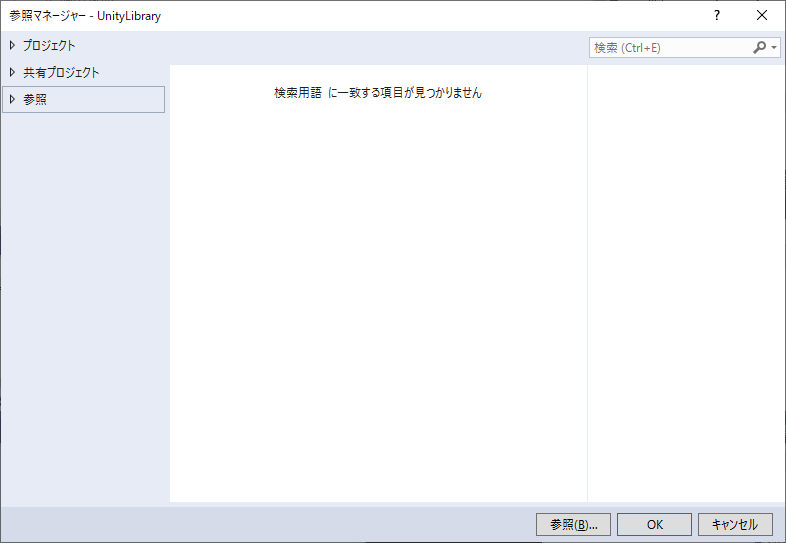
下の[参照]ボタンから次のパスのUnityEngine.dllを追加します。※ UnityEditor.dllと似ているので間違いやすいです。
C:\Program Files\Unity\Hub\Editor\<使用バージョン>\Editor\Data\Managed\UnityEngine.dll
C#でUnityEngineを使う
ClassOnDll.csにusing UnityEngine;を追加し、GameObjectを生成するコードを追加します。
using System;
using UnityEngine;

namespace UnityLibrary
{
    public class ClassOnDll
    {
        public string message = "Hello Dll World!";
        public GameObject CreateGameObject()
        {
            var cube = GameObject.CreatePrimitive(PrimitiveType.Cube);
            var meshRenderer = cube.GetComponent<MeshRenderer>();
            meshRenderer.material.color = new Color(0.5f, 0.8f, 1);
            return cube;
        }
    }
}
ビルドしてUnityLibrary.dllをUnity Editorを通さずエクスプローラからAssetsのUnityLibrary.dllに上書きします。
追加したメソッドを呼び出す
追加したメソッドをTestDllから呼び出します。
using UnityEngine;
using UnityEngine.UI;
using UnityLibrary;

public class TestDll : MonoBehaviour
{
    [SerializeField]
    Text text; // Inspectorからアタッチ
    void Start()
    {
        var classOnDll = new ClassOnDll();
        text.text = classOnDll.message;

        classOnDll.CreateGameObject();

        var sphere = GameObject.CreatePrimitive(PrimitiveType.Sphere);
        sphere.transform.position = new Vector3(0, 1, 0);
        var meshRenderer = sphere.GetComponent<MeshRenderer>();
        meshRenderer.material.color = new Color(0.5f, 0.8f, 1);
    }
}
ClassOnDllではCubeをTestDll側ではSphereを生成しました。
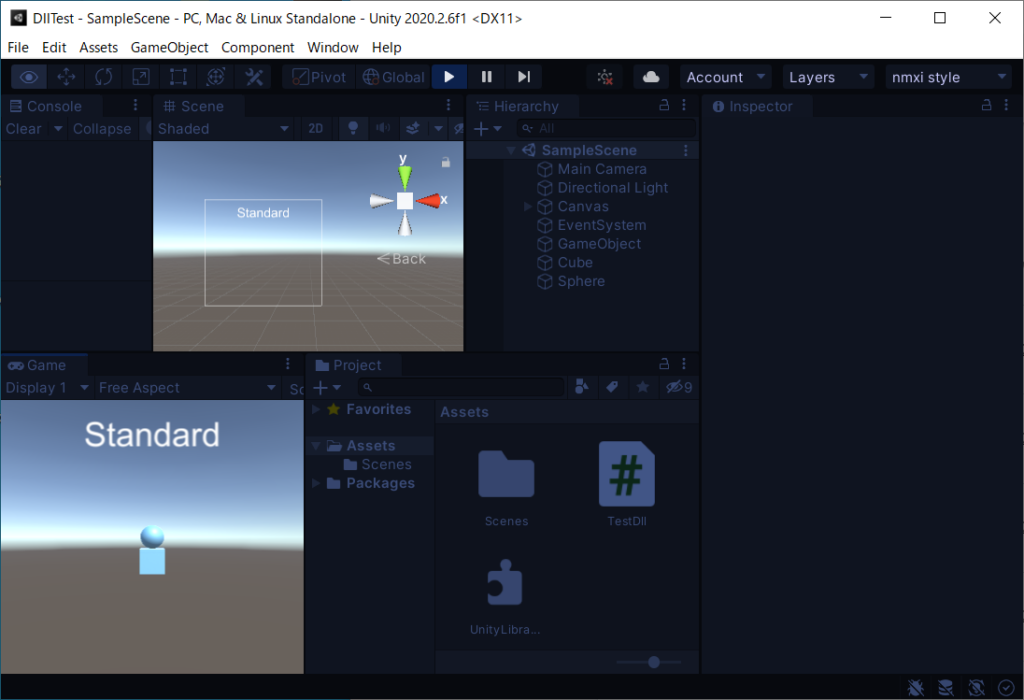
結果を確認する
Playボタンで確認する。
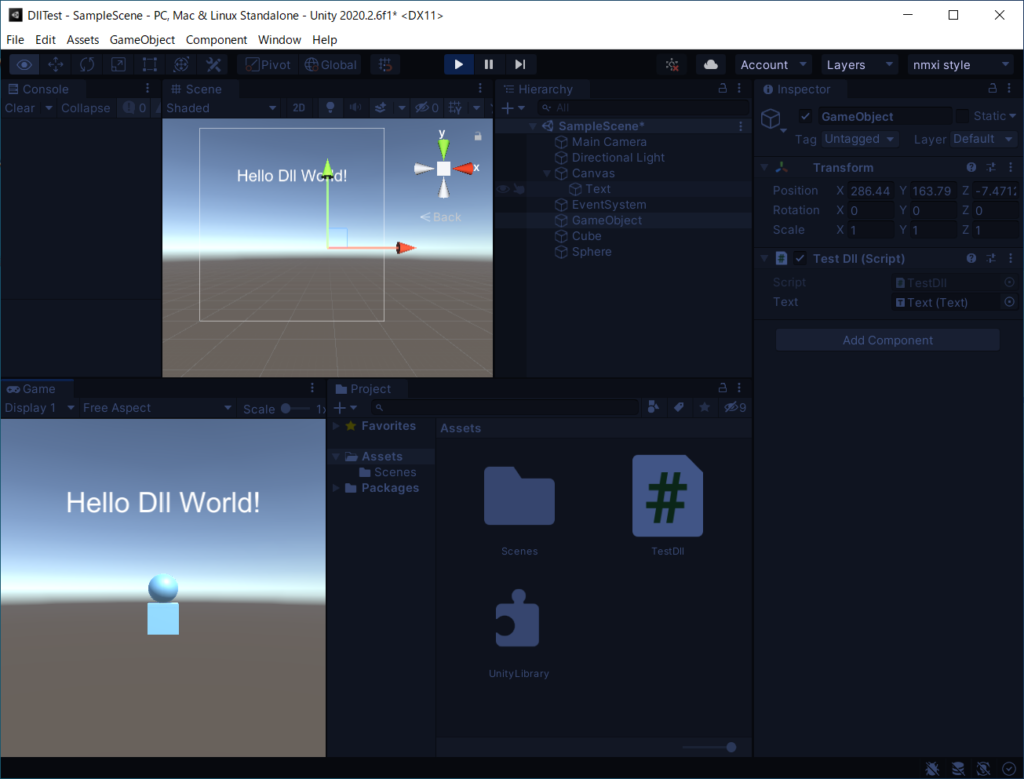
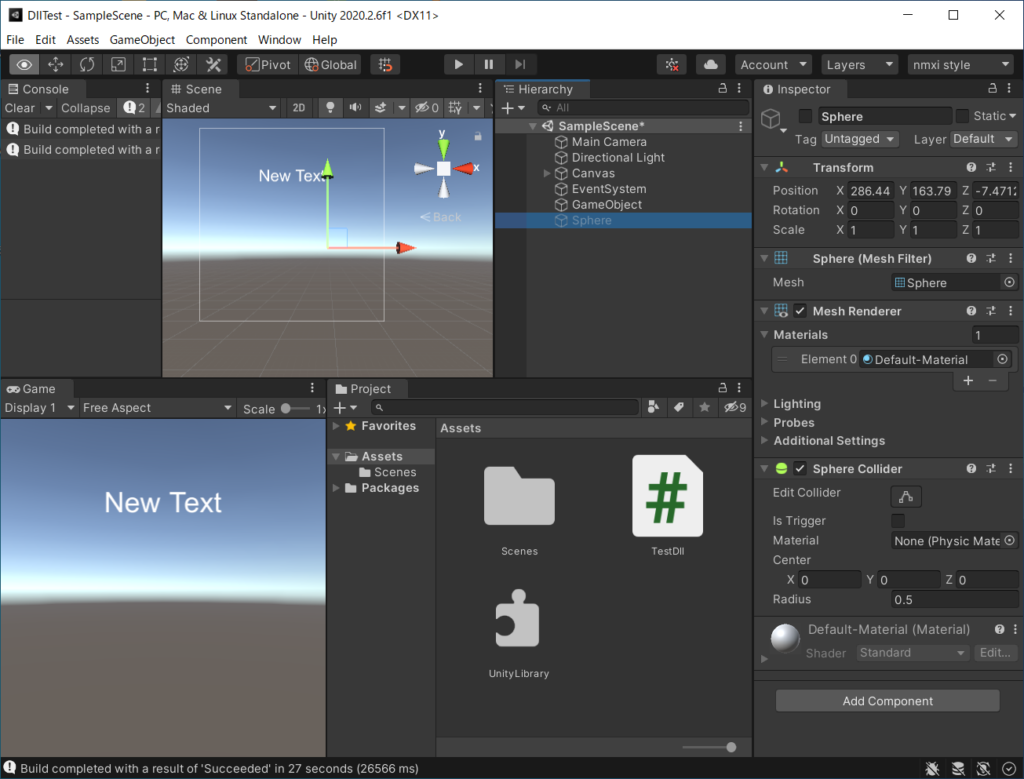
Dllで作成したCube GameObjectが表示されました。
PC上で結果を確認する
[ESC]でアプリが終了するようにコードを追加します。
using UnityEngine;
using UnityEngine.UI;
using UnityLibrary;

public class TestDll : MonoBehaviour
{
    [SerializeField]
    Text text; // Inspectorからアタッチ
    void Start()
    {
        var classOnDll = new ClassOnDll();
        text.text = classOnDll.message;

        classOnDll.CreateGameObject();

        var sphere = GameObject.CreatePrimitive(PrimitiveType.Sphere);
        sphere.transform.position = new Vector3(0, 1, 0);
        var meshRenderer = sphere.GetComponent<MeshRenderer>();
        meshRenderer.material.color = new Color(0.5f, 0.8f, 1);
    }
    void Update()
    {
        if (Input.GetKey(KeyCode.Escape))
        {
            Application.Quit();
        }
    }
}
[File]-[Build Setting]でPlatfomにPCを選び[Biuld]ボタンを押します。
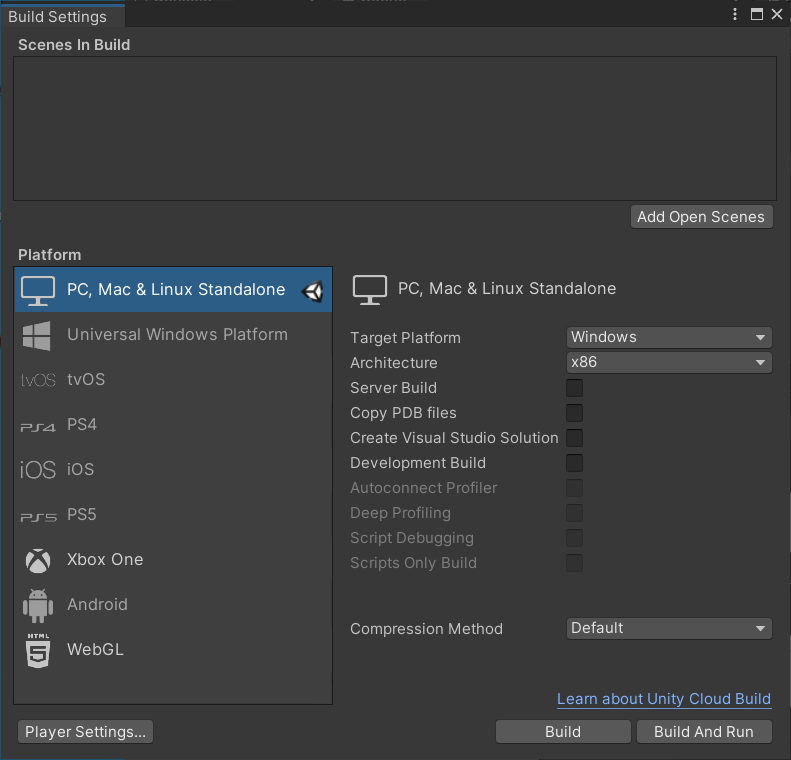
Build先のフォルダを選択します。
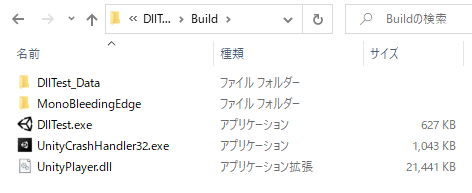
作成されたexeファイルをダブルクリックで実行します。
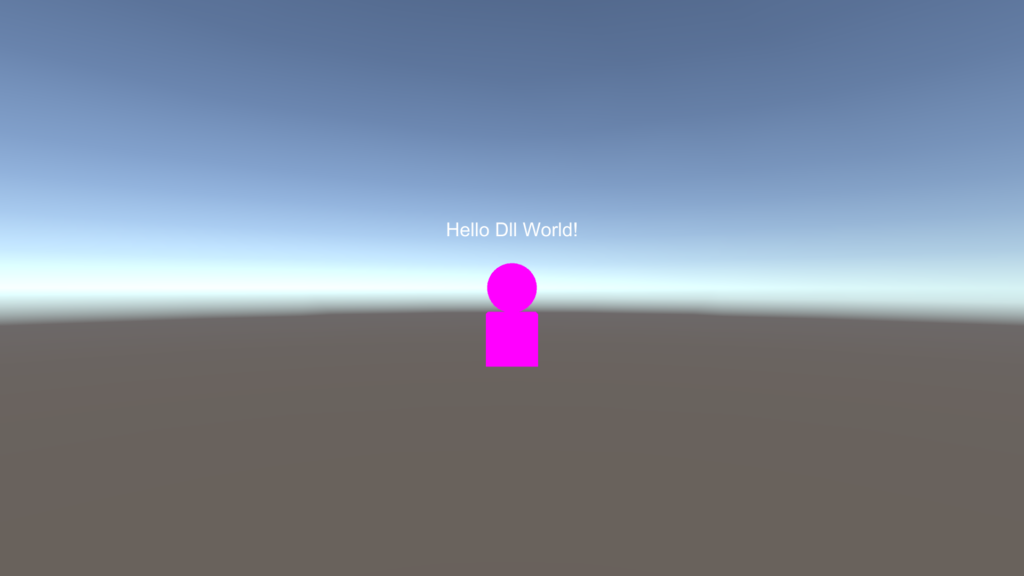
Unity EditorでのPlayとは異なるピンク色で表示されました。
HierarchyでSphereを生成して非アクティブにしたら色が付きました。

Shaderに問題があるようなのでShaderの名前を表示してみました。
using System;
using UnityEngine;
using UnityEngine.UI;
using UnityLibrary;
public class TestDll : MonoBehaviour
{
    [SerializeField]
    Text text; // Inspectorからアタッチ
    void Start()
    {
        var classOnDll = new ClassOnDll();
        text.text = classOnDll.message;
        classOnDll.CreateGameObject();
        try
        {
            var sphere = GameObject.CreatePrimitive(PrimitiveType.Sphere);
            sphere.transform.position = new Vector3(0, 1, 0);
            var meshRenderer = sphere.GetComponent<MeshRenderer>();
            meshRenderer.material.color = new Color(0.5f, 0.8f, 1);
            text.text = meshRenderer.material.shader.name;
        }
        catch (Exception ex)
        {
            text.text = ex.Message;
        }
    }
    void Update()
    {
        if (Input.GetKey(KeyCode.Escape))
        {
            Application.Quit();
        }
    }
}
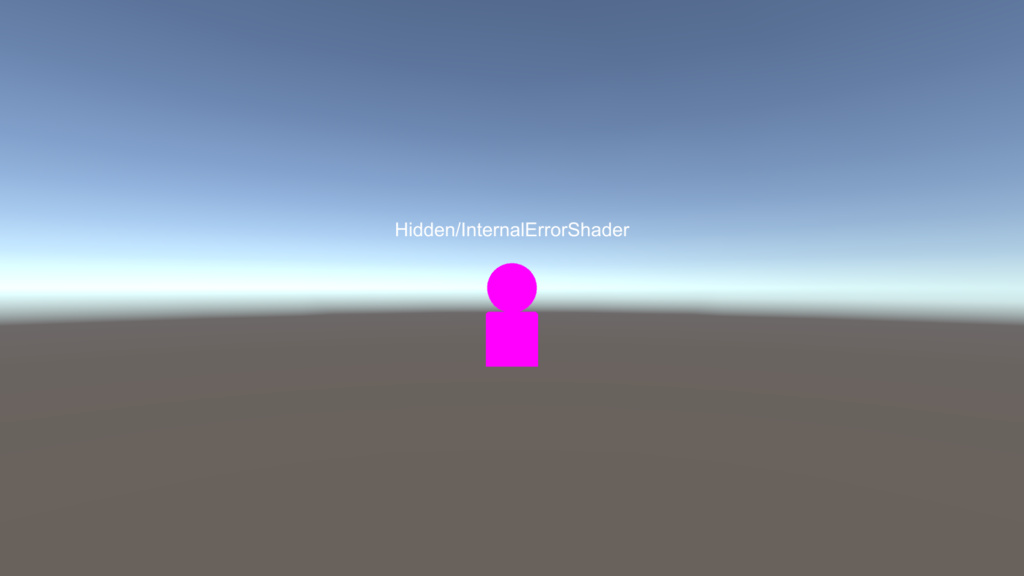
Unity EditorのPlayでは”Standard”ですが、PC上では”Hidden/InternalErrorShader”と表示されました。
Standard Shaderを常にincludeする
TestDllを元に戻しました。
using System;
using UnityEngine;
using UnityEngine.UI;
using UnityLibrary;

public class TestDll : MonoBehaviour
{
    [SerializeField]
    Text text; // Inspectorからアタッチ

    void Start()
    {
        var classOnDll = new ClassOnDll();
        text.text = classOnDll.message;

        classOnDll.CreateGameObject();

        var sphere = GameObject.CreatePrimitive(PrimitiveType.Sphere);
        sphere.transform.position = new Vector3(0, 1, 0);
        var meshRenderer = sphere.GetComponent<MeshRenderer>();
        var material = meshRenderer.material;
        material.color = new Color(0.5f, 0.8f, 1);
    }

    void Update()
    {
        if (Input.GetKey(KeyCode.Escape))
        {
            Application.Quit();
        }
    }
}
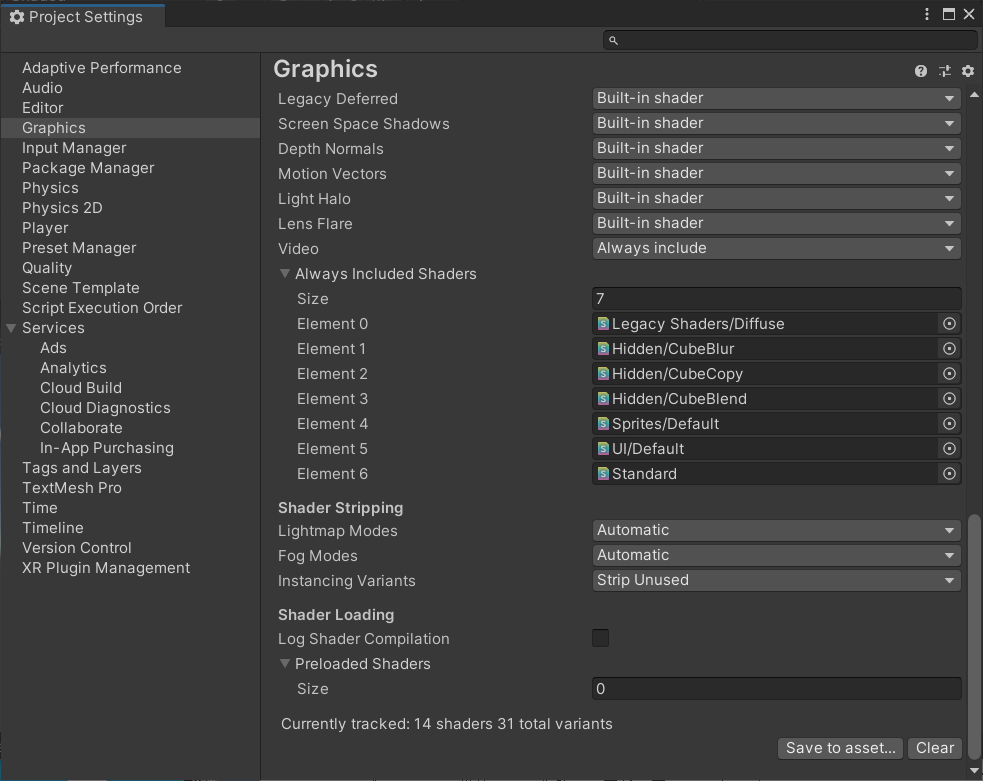
[Edit]-[Project Settings]-[Graphics]の[Allways Included Shaders]のSizeを増やし、[Standard]を追加し、[Save to asset]ボタンを押しました。
[Build]-[Build Settings]で[Build]しました。かなり長い時間ビルドしていましたが、表示されるようになりました。

コメント